Mid-Spring is kind of an antsy time on the homestead for me. Seedlings are starting to emerge and they take a lot of water and weeding until the garden is in full swing. I have to watch the bees for swarming. Projects need to be done. And the weather is all over the place. I was so grateful for three whole days of rain this week. We desperately need it.
A few weeks ago, we had an open farm day, where we met many neighbors; answered questions about the alpacas, hens, and bees; and sold some dryer balls and greeting cards. We plan to have additional farm days at least once a month during summer and fall.
In the meantime, here’s what’s going on:
Bees
 The Bee & Bee is thriving! My big task at the moment is keeping an eye out for swarm cells and deciding if/when to split them into a second hive. In a nutshell, a honeybee colony is better thought of as a superorganism that reproduces itself rather than individual bees reproducing. When a colony survives the winter like this one did (yay! yay!), their population climbs quickly and they start to think about throwing off a swarm—a new colony. When that happens, they build queen cells at the bottom of frames, and once those are growing new queens, the bees gorge themselves on honey and about half of them leave with the old queen. They usually land on a nearby tree and scout bees fly out to look for a new place to live. Some beekeepers love to catch swarms (free bees!). Queen Leslie Knope II is doing an amazing job and I just spent good money on her in my emergency requeening last year, so I would very much like for them to not swarm away with her. If I see that they are getting ready to swarm, I can split them to try to prevent it. Or I can split them preemptively. I need to decide which very soon, I think.
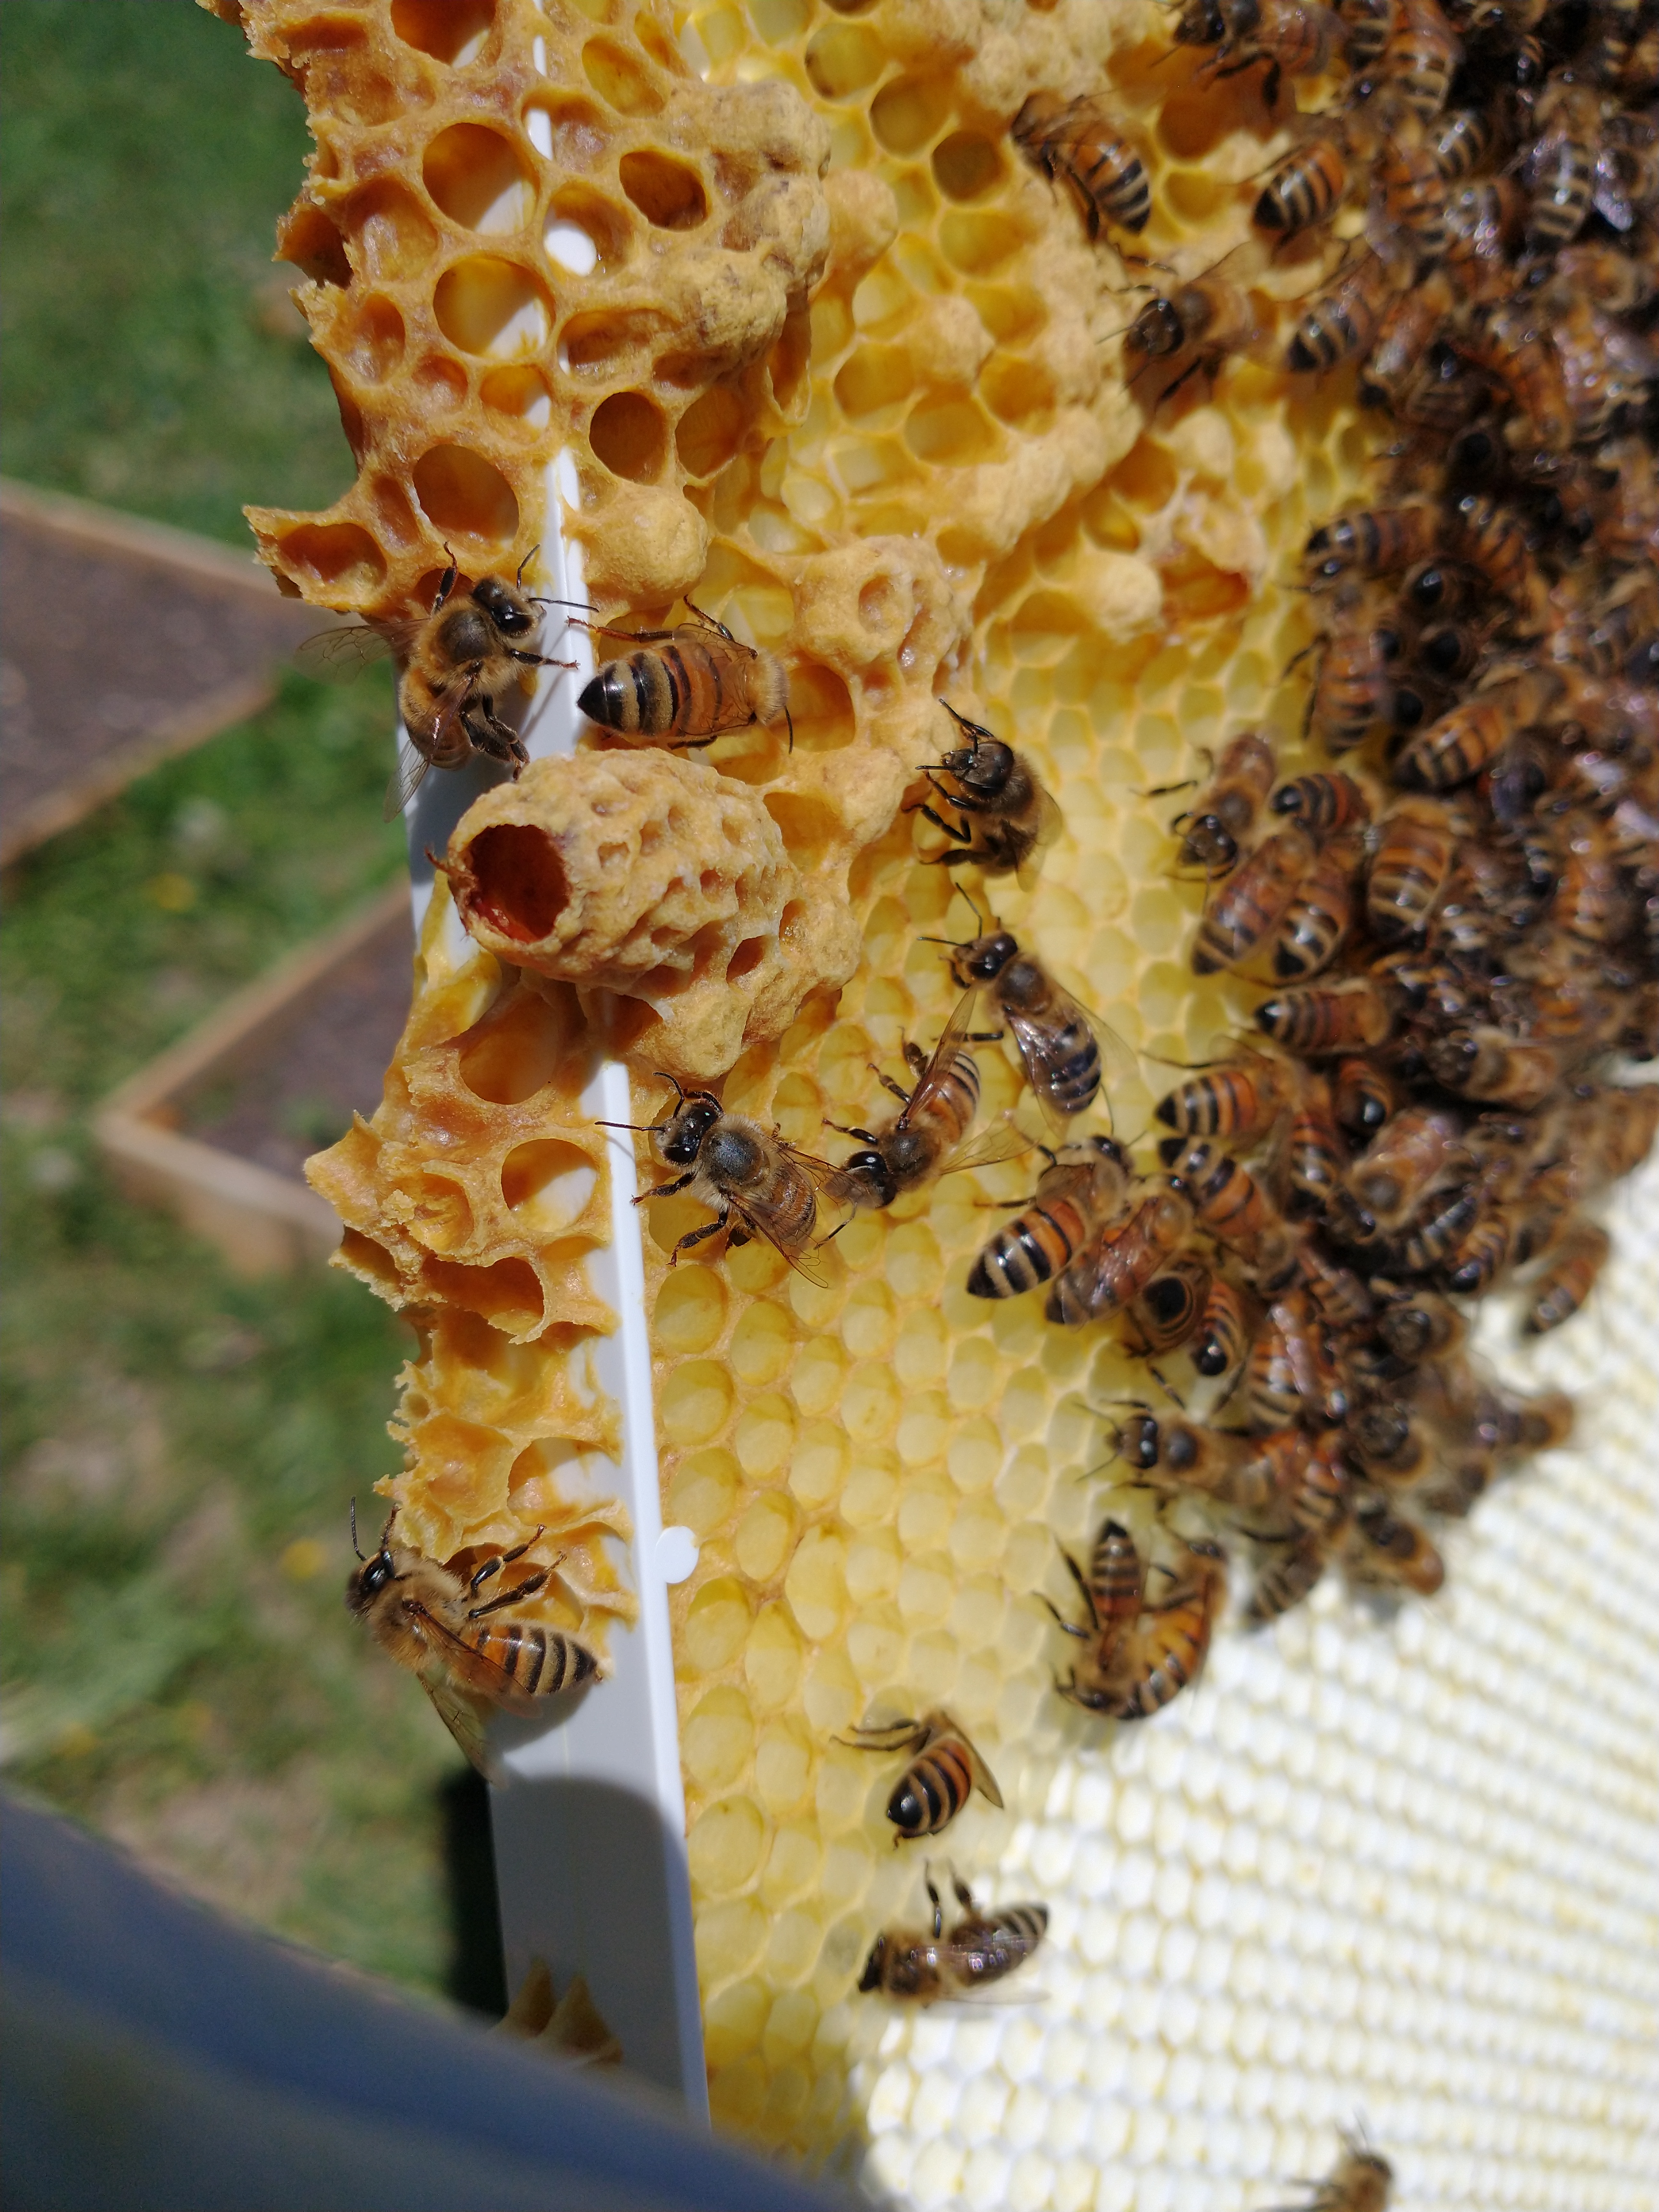
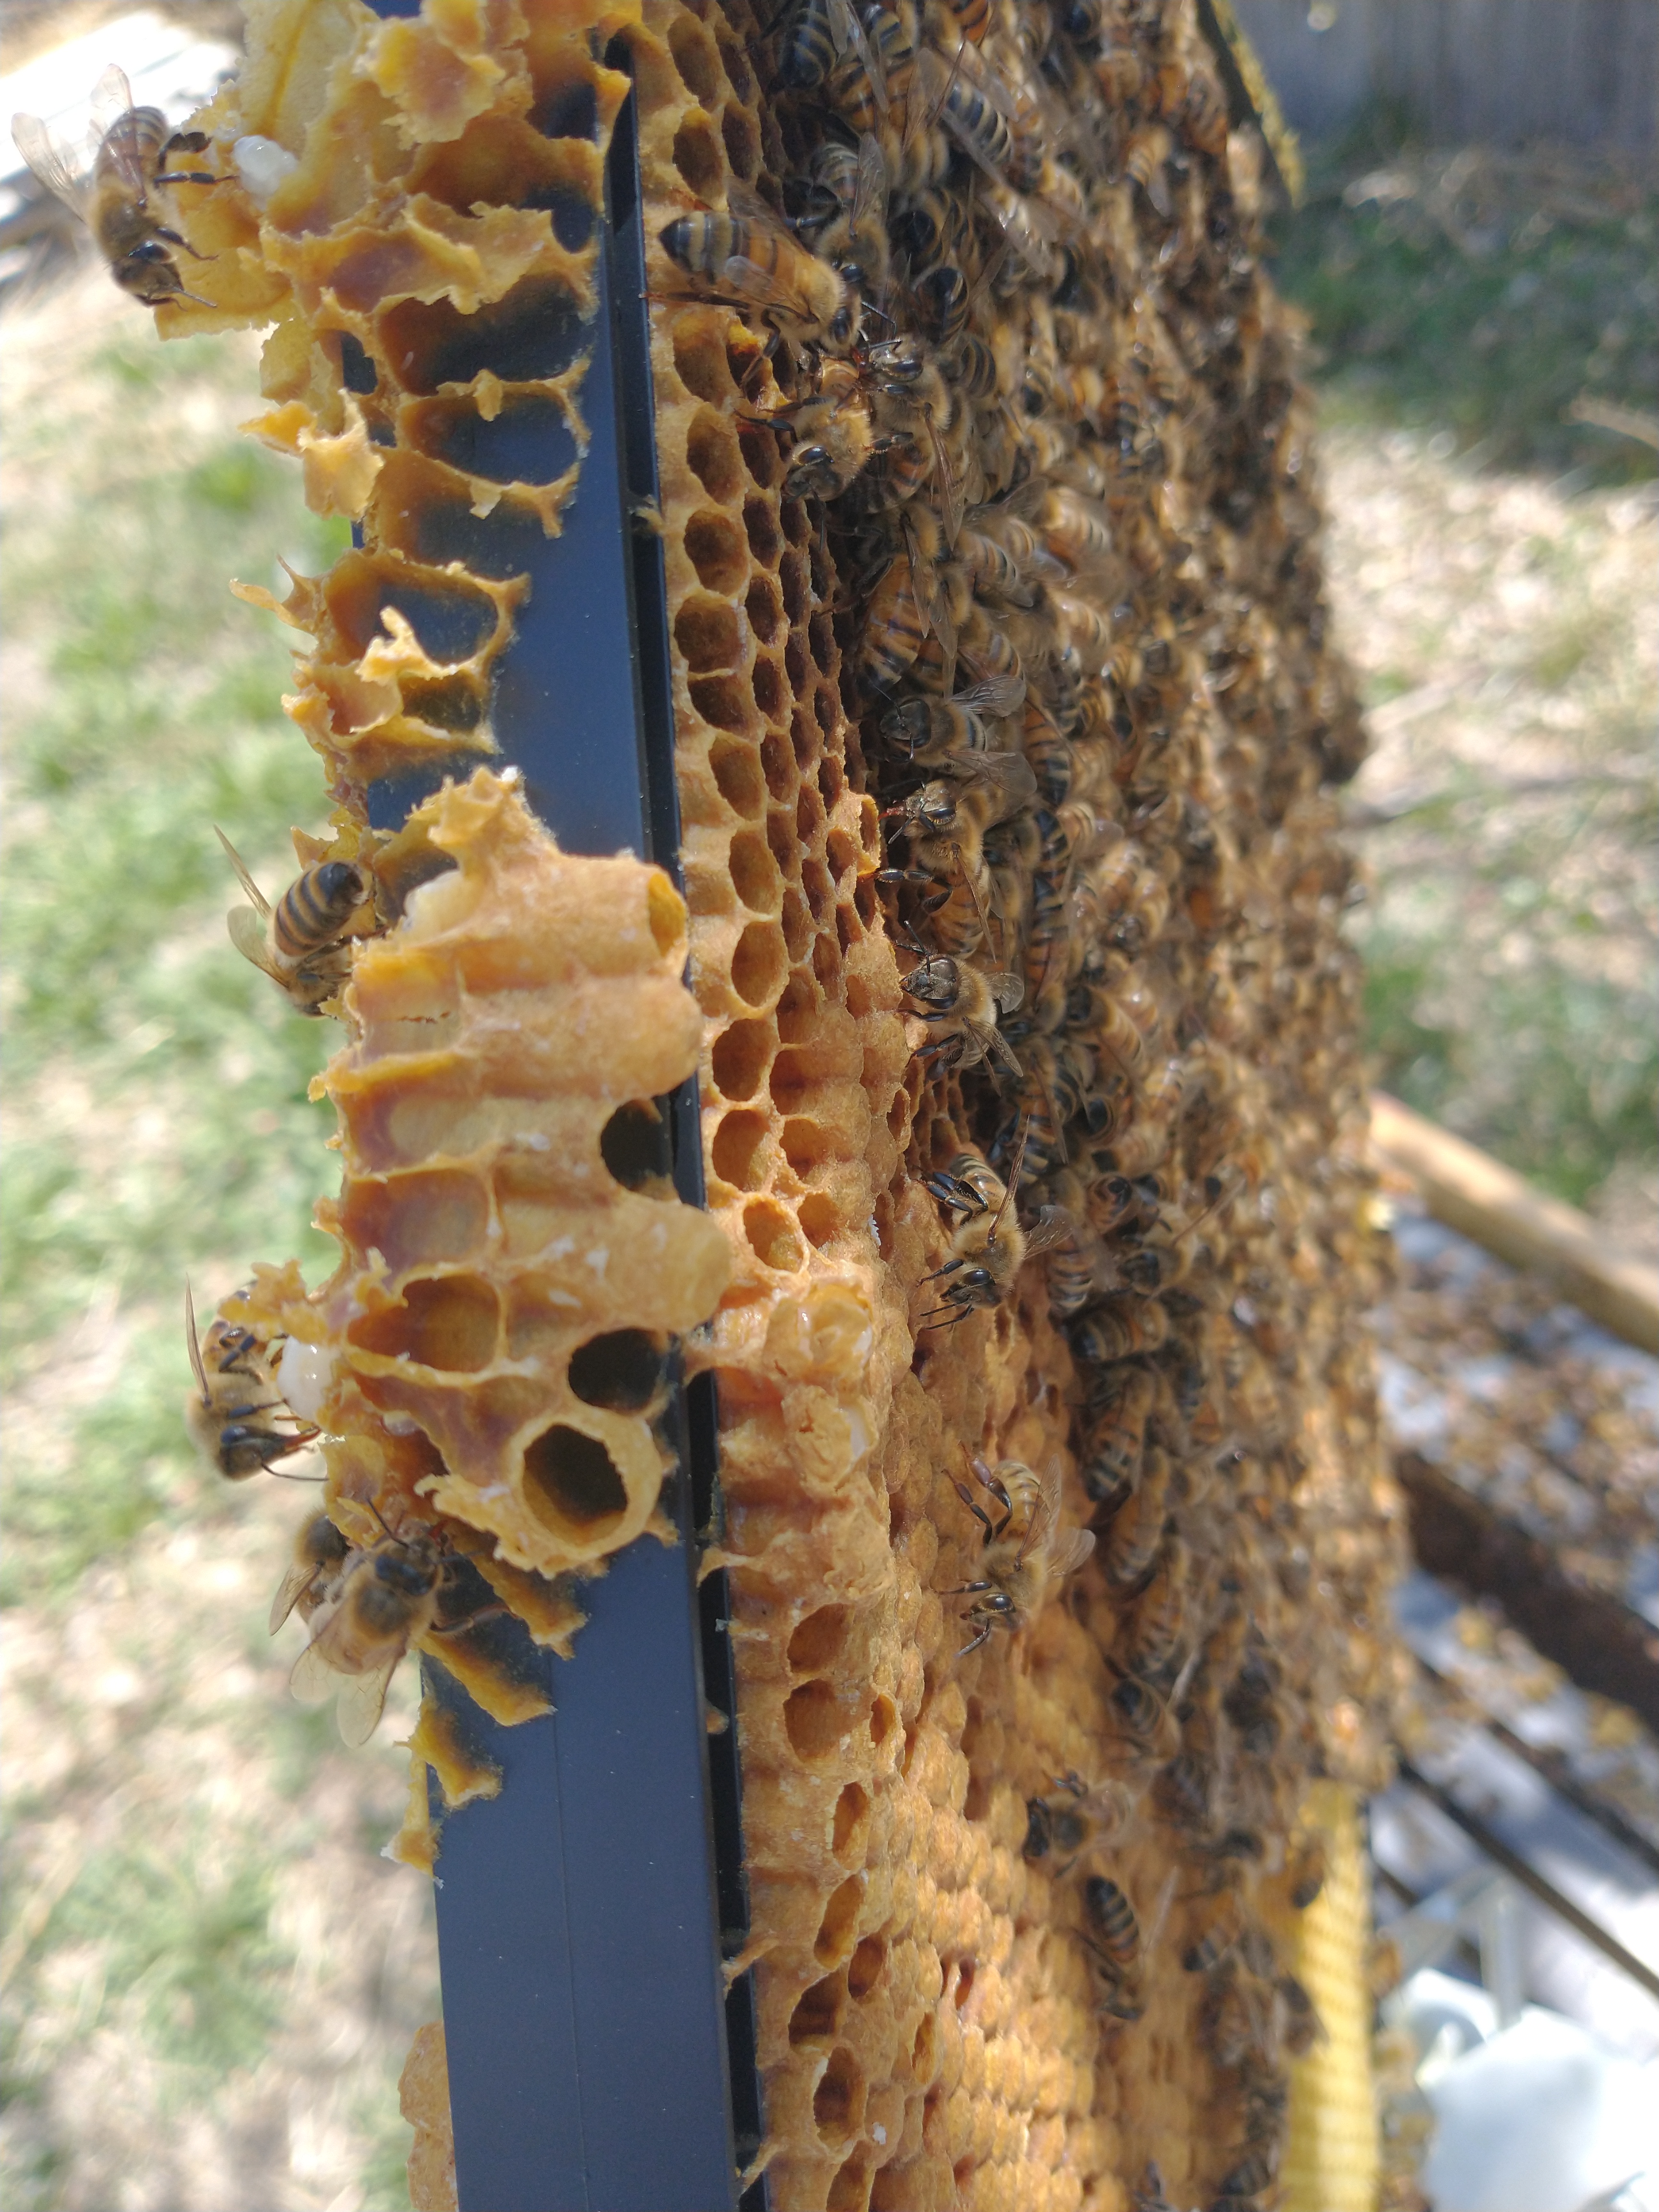 The bees have started to build drone comb in-between the two deep boxes that make the brood nest. Last week during my hive inspection, I was worried that it was swarm cells, but a closer inspection clearly revealed that it was drone cells. Drone (male bee) cells look like bullets. Queen cells look like peanuts and hang down from the bottom of the frame or perpendicular to the rest of the comb. I think they were annoyed that I destroyed some of the drone cells when I pulled the frames out. Sorry girls!
Today during my hive inspection, I found some good news and some bad news. I have been feeding them 1:1 sugar syrup in hopes that they will start drawing fresh comb in their honey super. They weren’t, so I took the queen excluder off last week. I had put it in place so that the brood the queen laid in the old, mite treatment tainted comb could hatch out before I put clean frames in. Today, I saw that they were starting to build comb.  Yay! It was mostly cross comb, so I pushed it into the frame, wanting them to use the wax to build the comb on the frame instead of out from it. The bad news was that there was a patch of mold on the bottom board. The bee shop sold me some pollen patties a couple of months ago and I put one in the brood nest, but it started to melt and drip onto the bottom board. Clearly, that was the origin of the mold. I could smell that something was off as soon as I opened the hive. It wasn’t as sweet as usual. Fortunately, the spot of mold was small, so I was able to scrape it and flip the bottom board before the mold caused any real damage to the hive or the comb. Phew! Beekeepers, do you use pollen patties? This was my first experience and I’m not sold on them. I am so happy that the hive is doing well!
 That One Bee
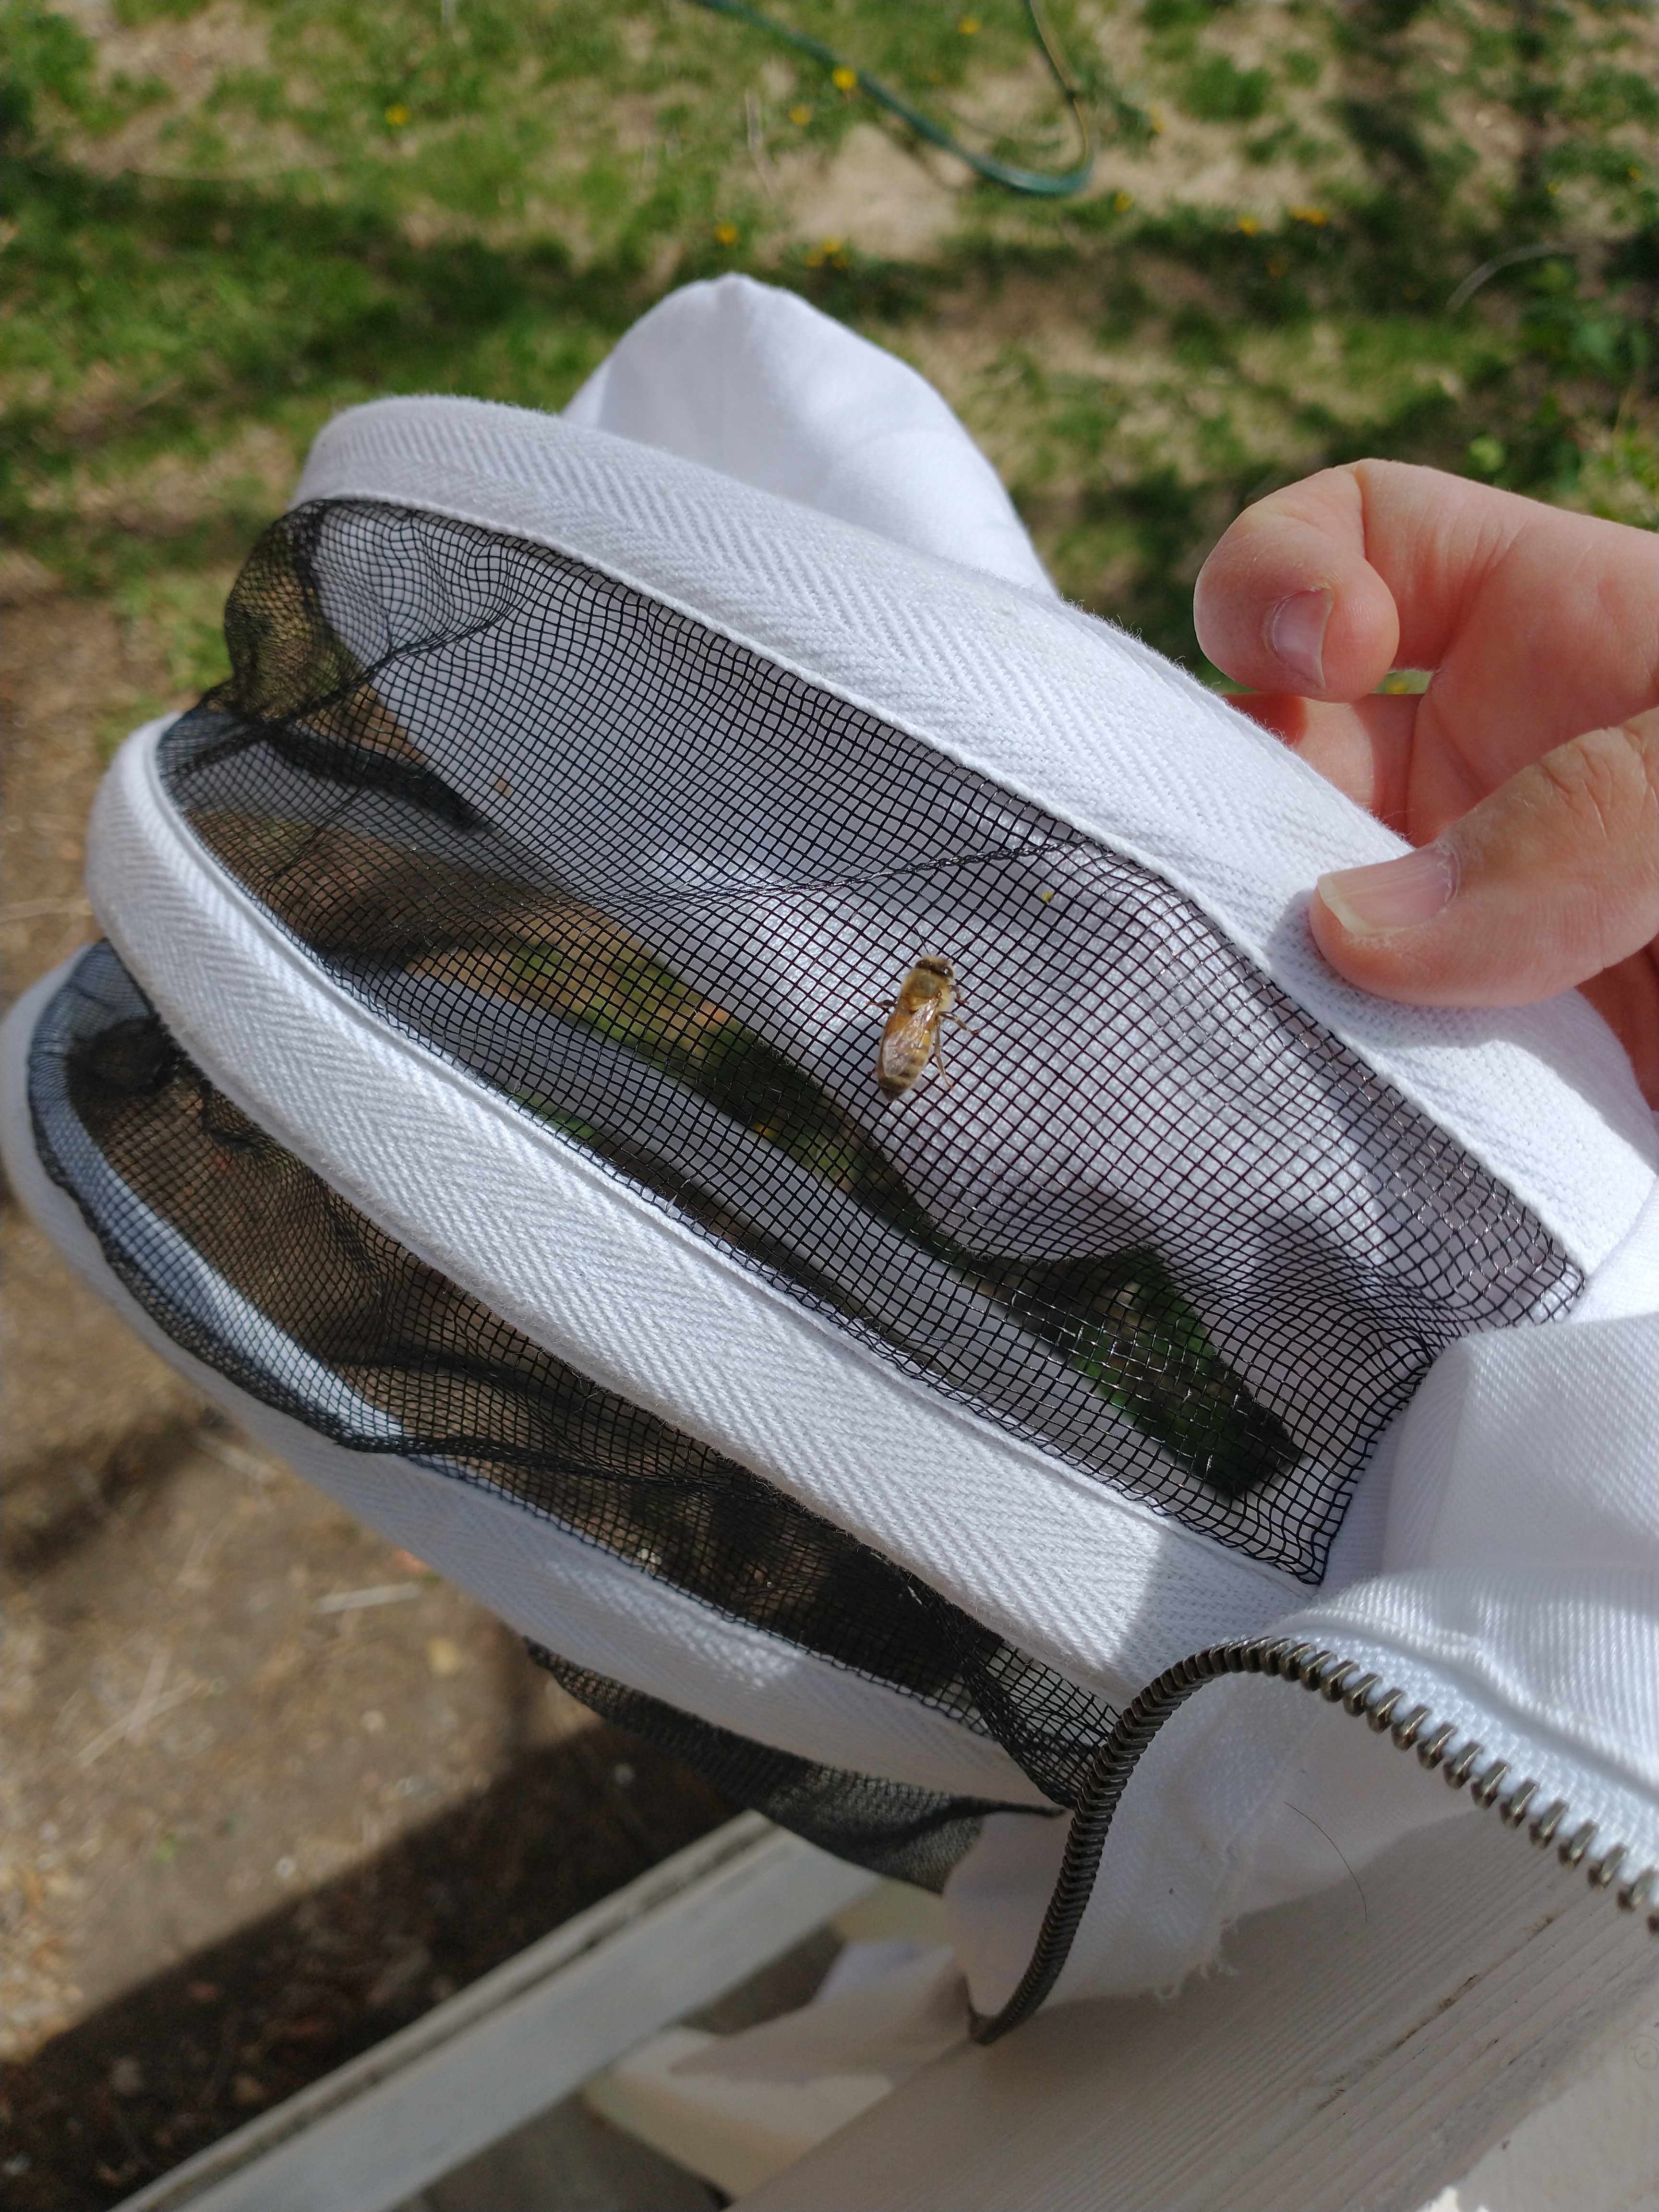
In general, my bees are very sweet, but often there is one guard bee who just won’t quit. When I take my glove off to take pictures she’s buzzing at my hand. When I go home, she follows me. In an online beekeeping group I’m in, I saw this bee referred to as That One Bee. This year’s hypervigilant guard bee has emerged. When I was filling garden beds (more on that below), she kept buzzing me. I have sat by the hive and watched the bees without having an issue, but that day she was on the warpath. Today, I had a bee hang out on my beesuit for the longest time after I was done. Beekeepers, do you have That One Bee?
Garden
 I have started to harden off my seedlings (tomato, eggplant, echinacea, verbascum, and pepper) before transplanting them outside. My pumpkin seedlings were looking really good, if leggy, but they withered and died while I was hardening them off. If I am completely honest, I think what did it was that they were sitting on the kitchen counter overnight and, on an impulse, I watered them with leftover coffee and it was tooooooo much nitrogen. Sorry, plant babies. I love you.
Before those three days of rain, however, I was able to plant corn, green beans, and pumpkins outside in the pumpkin patch and the new raised beds. This year I am growing two types of corn, purple green beans, and a wide variety of winter squash: Porcelain Princess Pumpkin, Mashed Potato Squash, Atlantic Giant Pumpkin, Baby Bear Pumpkin, Naked Bear Pumpkin, Long Island Cheese Pumpkin, Luffa Gourd, Igor Pumpkin, Jack O’Lantern, Harvest Moon Squash, Butternut and Acorn Squash, and Kabocha Squash.
I thought that I was planting them on the early side, but when I checked my records, I planted them on the same exact date last year. I hope to have a good harvest, using the insights about watering I learned last year. Again, fingers crossed.
About a month ago, when it looked like we were in the clear for frost, I planted summer squash, greens, peas, leeks, and carrots. Plenty of seedlings have started to come up. This weekend, I am planting the rest of the flowers, including several varieties of sunflowers. I am really trying to get the border around the horse run bursting with pollinator-friendly and native flowers this year. My efforts last year did not work out, but I think the soil was too hot, since it was largely made up from old horse poop we had to clean out of the barn. I mulched it heavily over winter to try to draw the nitrogen out. I hope this year things grow better. At any rate, a single grape hyacinth made its way from the front yard to the back, and they are good spreaders, so nature might do the work for me. Thanks, girl.
Compost
I have been struggling with composting for two years now. I was told that it’s not really that hard, but I can’t seem to get my compost to compost all the way. It didn’t smell bad or anything, it just was not breaking all the way down into good dirt. I spent some time doing research over the winter and came to the conclusion that I was
- not turning my compost often enough
- including scraps that were too big and
- not giving it enough time.
After listening to an episode of Gimlet’s How to Save a Planet Podcast (which is very good) called Waste, Worms, and Windrows: Domingo Morales’ Quest to Make Compost Cool, I felt convicted to get my compost efforts back in action. The episode does a good job of explaining why composting is better for the environment and talks about Morales’ efforts to bring composting to New York City on a bigger scale. It’s worth a listen. Since then, I have been diligently turning our tumblers almost every day and putting all of our non-dairy food scraps into a container to go out each day (We don’t eat meat, but if you do, that doesn’t go in compost). I use our kitchen shears to cut fruit peels into smaller pieces and crush the eggshells before tossing them in. It’s a little more effort, but also strangely satisfying. We have two tumblers and I let one rest while I filled the other. The full one is now being turned while it breaks down, but I’m not adding anything new anymore, and have moved to the second tumbler. I can tell by the weight when I turn them that the food is breaking down. Will it turn all the way back into dirt this time? Fingers crossed. If you are good at this, I would love tips.
Alpacas
 The alpacas are set for shearing during the first weekend of June. It will be Luna’s first shearing and we are a little nervous about how Miss Firecracker will handle it. She is still very protective of her baby. Luna is almost eight months old. It seemed like Miss Firecracker was weaning her back in February, but Luna is still nursing sometimes, so it is taking awhile. From what I’ve read, when left to their own devices, alpacas wean around 8 months old, so I expect that we will see the nursing sessions continue to wane over the next month or so, until they end completely. Miss Firecracker is not losing weight, and we are not planning to breed her again anytime soon, so we have no reason not to let her follow her instincts.
The pool is back out for the alpacas. Anytime I get the hose out to water plants, they run over to their pool and wait for me to top it up. They each have at least 2” of fleece on their backs, so you can imagine how hot they get on warm, sunny days. They also like to gather in the shade of the barn by the chicken coop. Miss Firecracker usually gets the shadiest spot.
Last weekend, I was filling in the new raised beds that Julio and his dad built. I put a layer of alpaca poop on the bottom of each bed as filler and for the added nutrients. As I struggled to get the wheelbarrow, which I discovered too late has a flat tire, through the gate, Moira pushed her way into the backyard to eat the grass. As if Moira wasn’t enough to handle, I took pity on the other girls, who were looking on jealously. I let them eat the yard last year and was usually able to get them back over the fence without too much fuss. This time was different, however. Not only did they leave poor Luna behind, they would not go back to the pasture no matter what I tried. I used a treat to try to bait them into the pasture or barn. I banged on a bucket to scare them. I chased them. I tried to push them. I sprayed them with the hose. I turned on the sprinkler. An hour later, I just charged at them yelling “Go! Go! Go!”, making myself as big and menacing as I could. It worked. Fortunately, I didn’t get kicked or spit at (Theo thought about it) and they looked at me from the pasture like I had lost my mind. It was quite the drama.
Luna and Clementine need work on halter training and this experience just reinforced that maybe they all need a little work, so we will use that as an opportunity to let them eat the yard as well, but with less frustration getting them back across the fence.
 Chickens
The flock has really ramped up egg production and the problem of them eating their eggs is getting better. We’ve been getting 2-4 eggs a day on average. One day we got five! Julio’s theory is that whoever is laying the pale green eggs (Eliza?) is the head hen, because hers never get eaten. One of these days, we really are going to build them that tractor, but in the meantime some afternoons in the orchard await them.
Orchard
Speaking of the orchard, we think about half of our apple trees are dead. The rest have put out leaves and the pear trees are already in bloom. The rest, however, seem to have a bit of frostbite, or something else went wrong. I am pretty bummed. We watered them (although, in our climate, perhaps they could have used more), fertilized them, mulched, and wrapped the trunks. I am not sure what happened, but I am sad about the loss. We are going to keep watering them and keep our fingers crossed a bit longer.
 Part 2 of Julio’s Series on Clean Energy at Sol Homestead
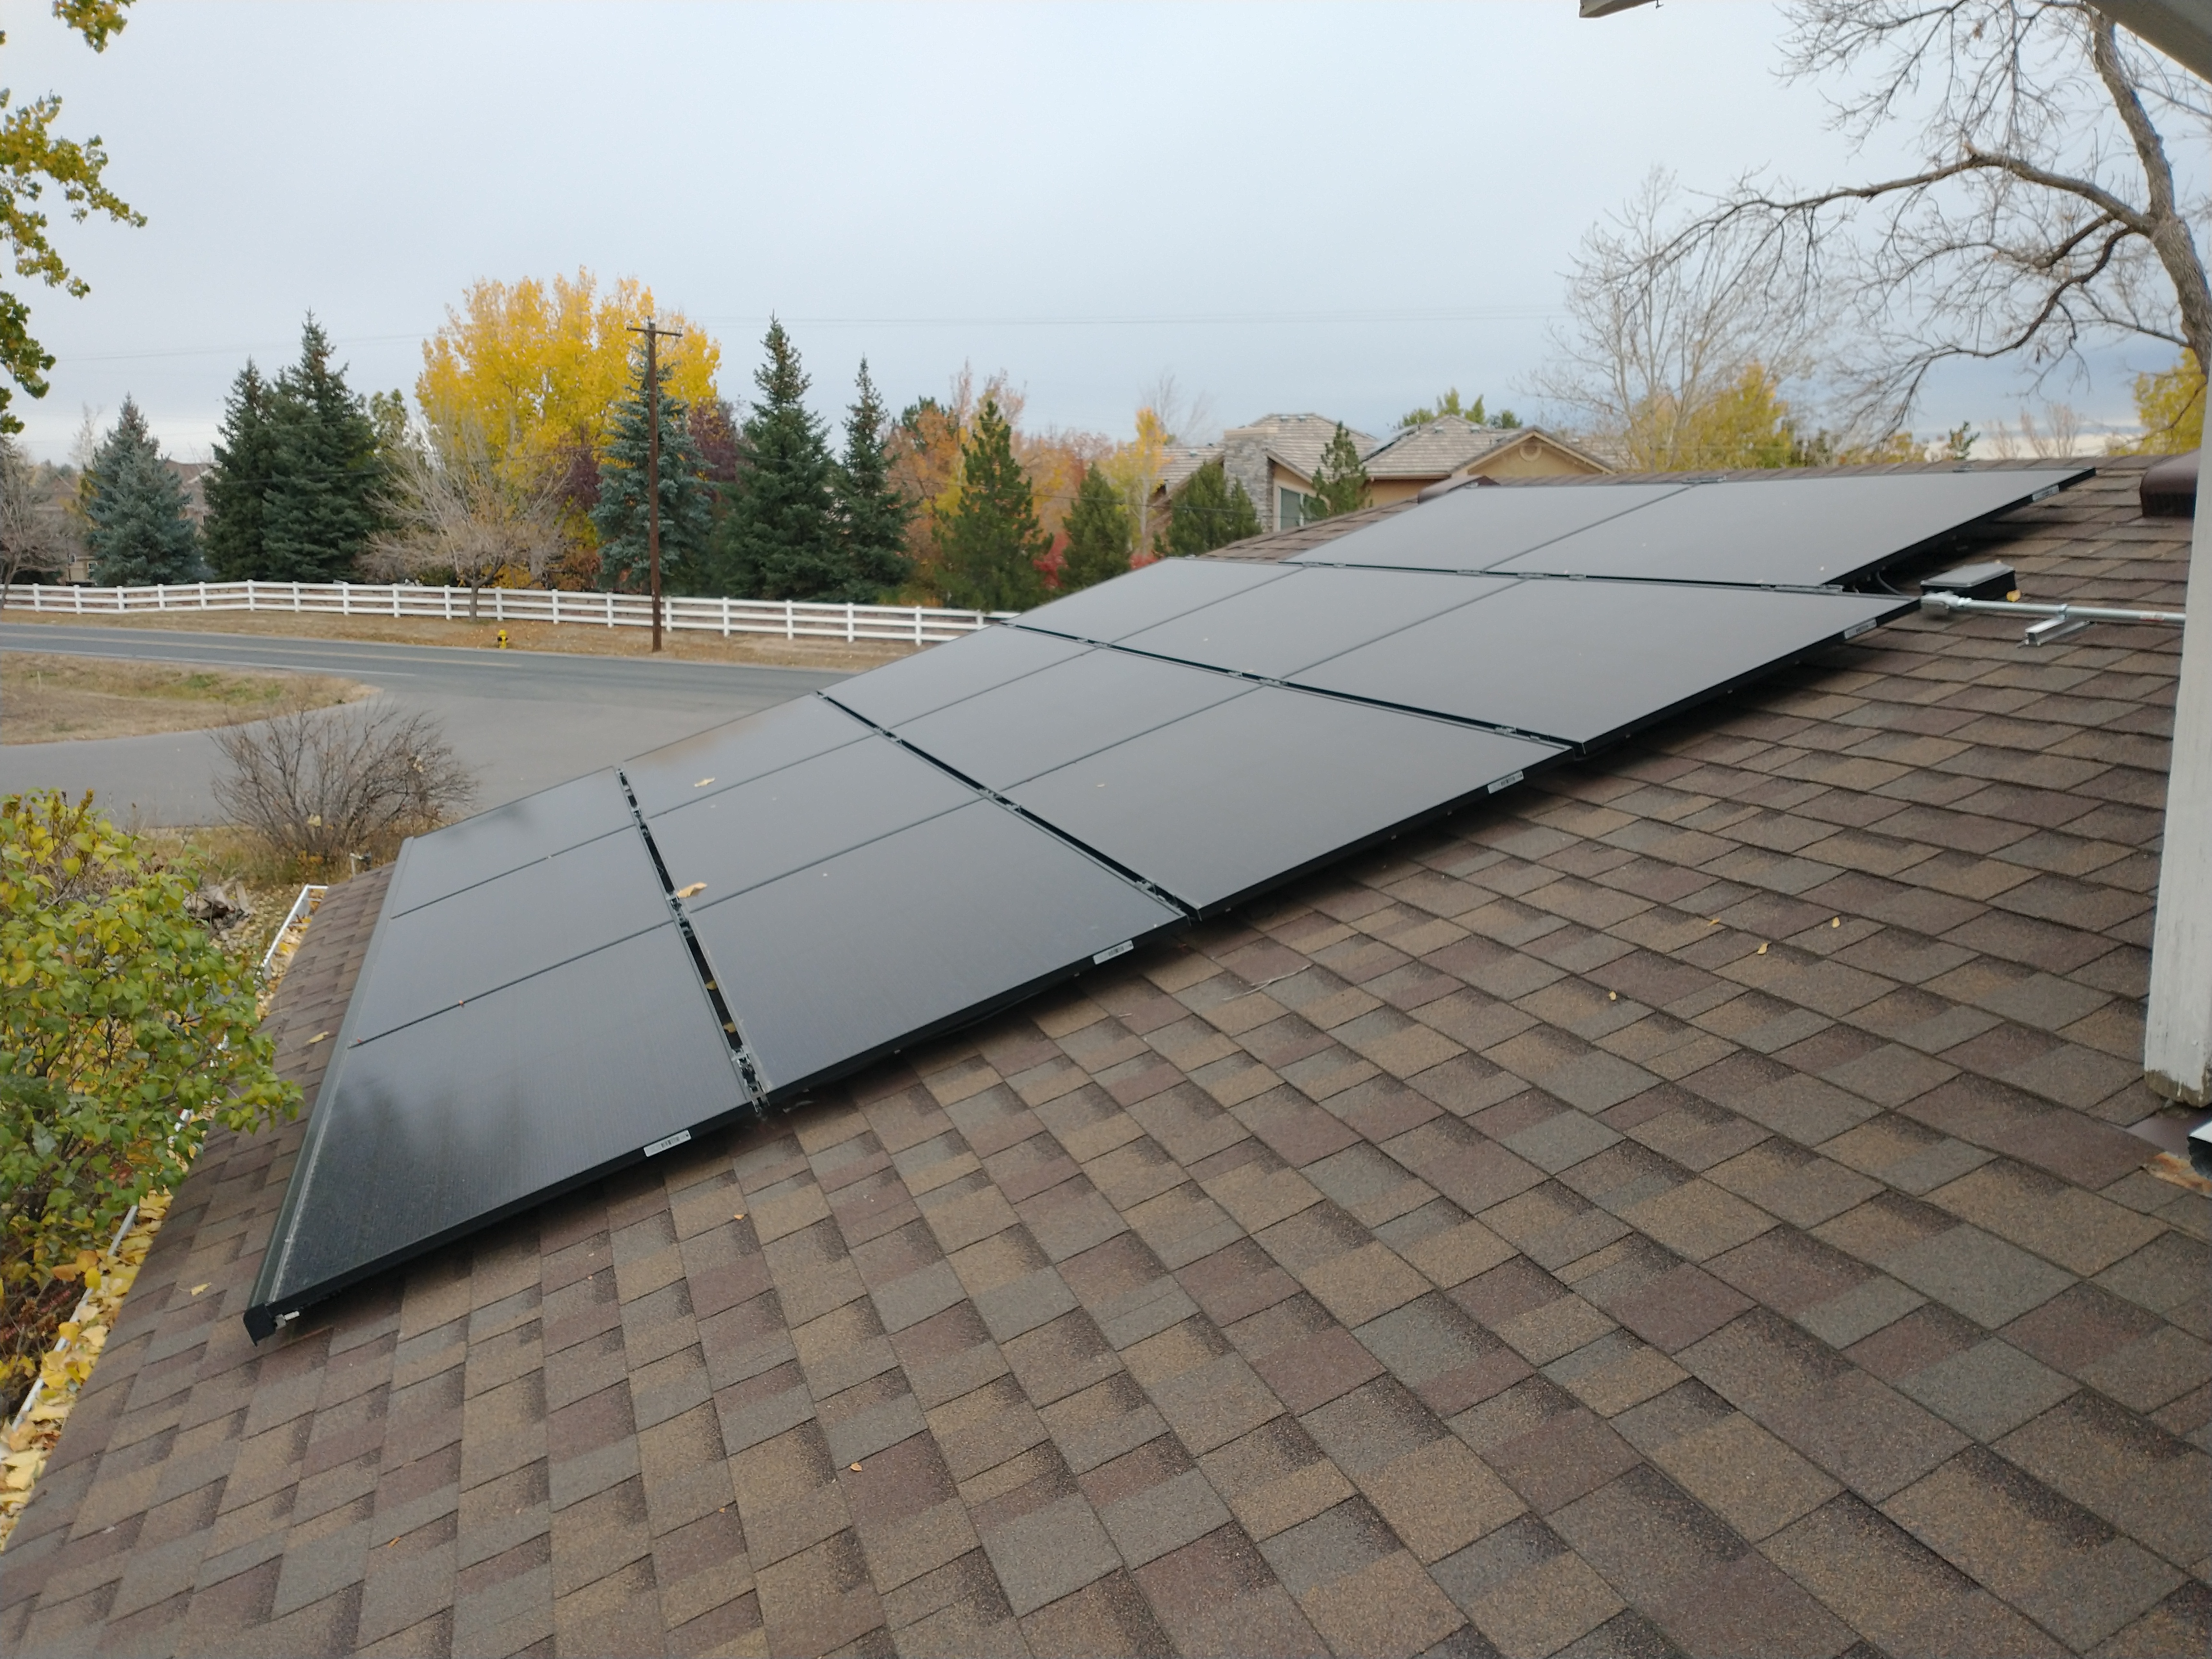 Since Sol Homestead’s solar panels powered on in late October, we’ve observed a significant dip in our electric costs month to month relative to previous years. This is in spite of fueling one of our cars with electricity, which increases our electric consumption significantly. It was quite nice to see a reduction in after-tax dollars spent both on powering our homestead’s electric needs and in fueling one of our vehicles – especially since it’s been an extra cold winter in Colorado, natural gas prices have been high (dollars towards natural gas consumption have increased).
 We are past the mid-point in winter and here in Colorado, it has been an exceptionally cold season, breaking and tieing decades-old records for low temps. Those cold days have had us inside more than we like. We even put our little one’s water table in the bathtub one day, just to shake things up. Snuggled under sweaters and blankets, we also had time to look at seed catalogs, make to-do lists, and dream a little bit about spring. We have several hopes and goals for the coming season.
 In the kitchen, I am growing baby houseplants for sale and microgreens to eat!
 Home
Home Our Etsy Shop is live now! You can visit it at
 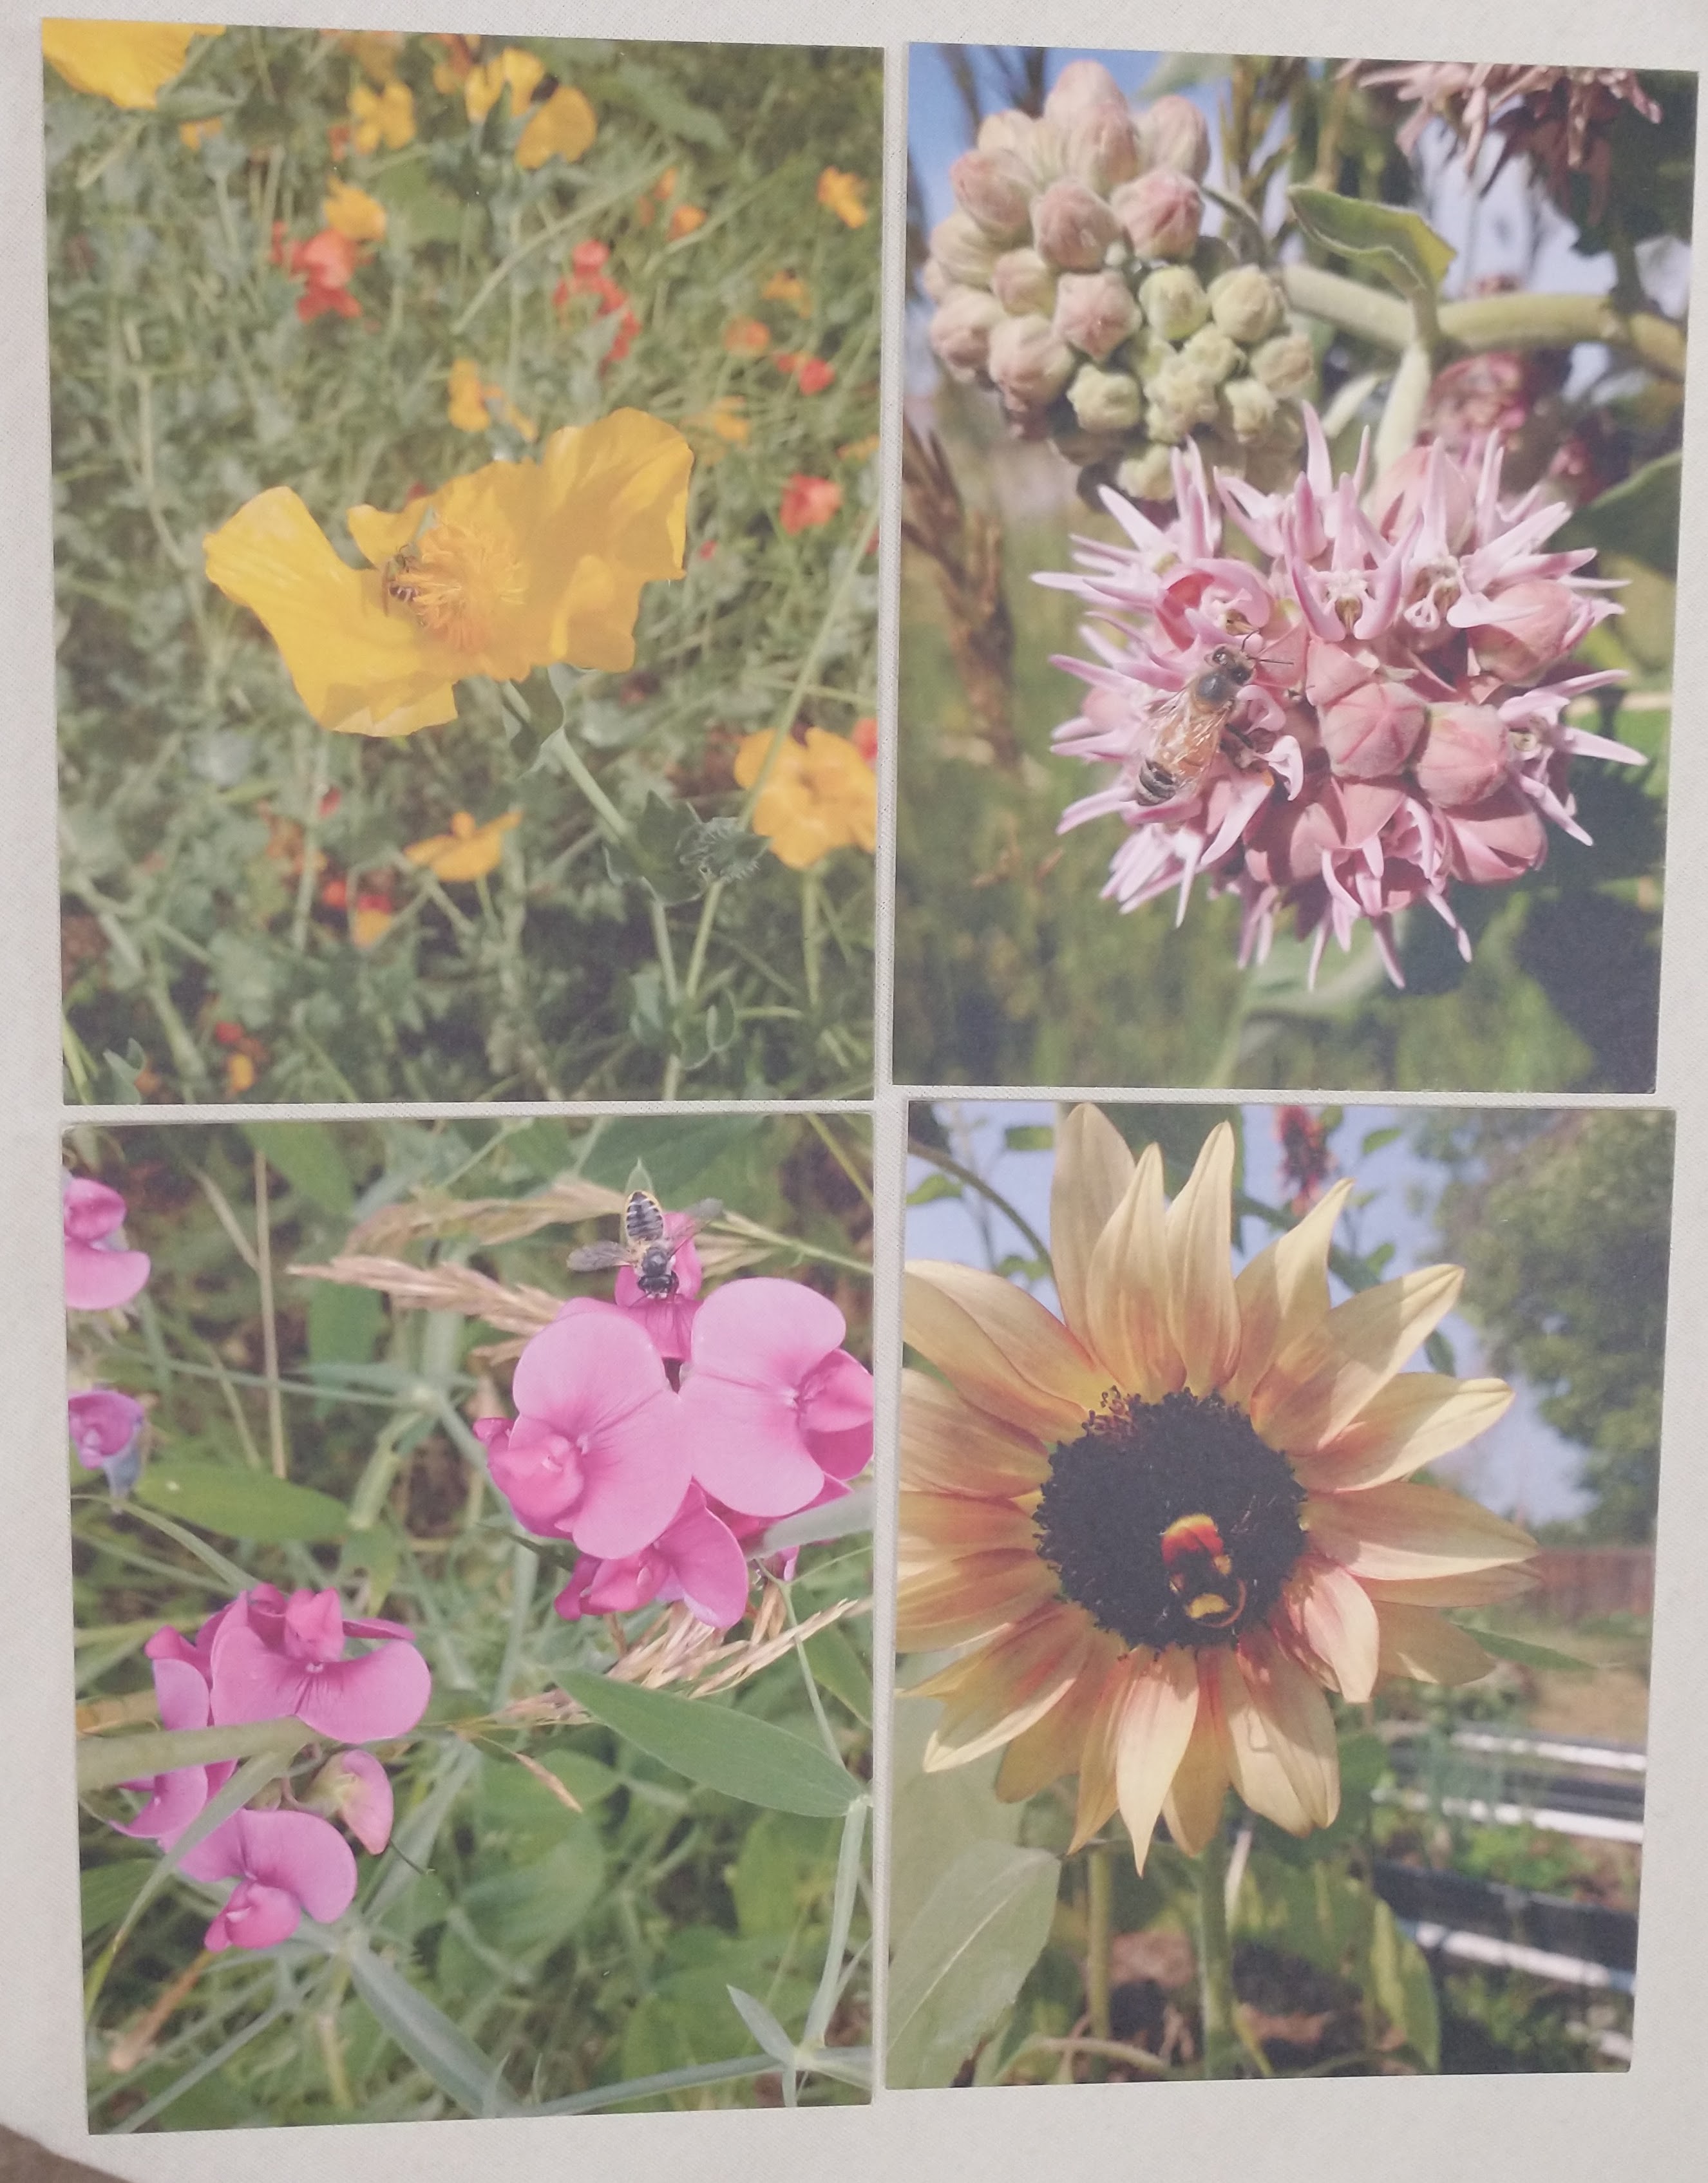 Also in the shop, we have a variety of greeting cards, including friendship cards and Mother’s Day cards. My favorite are the bee notecards, which feature four images of bees—a honey bee and three native bees. The bee cards can be purchased individually or as a set of four. They are postcard shaped but come with envelopes.
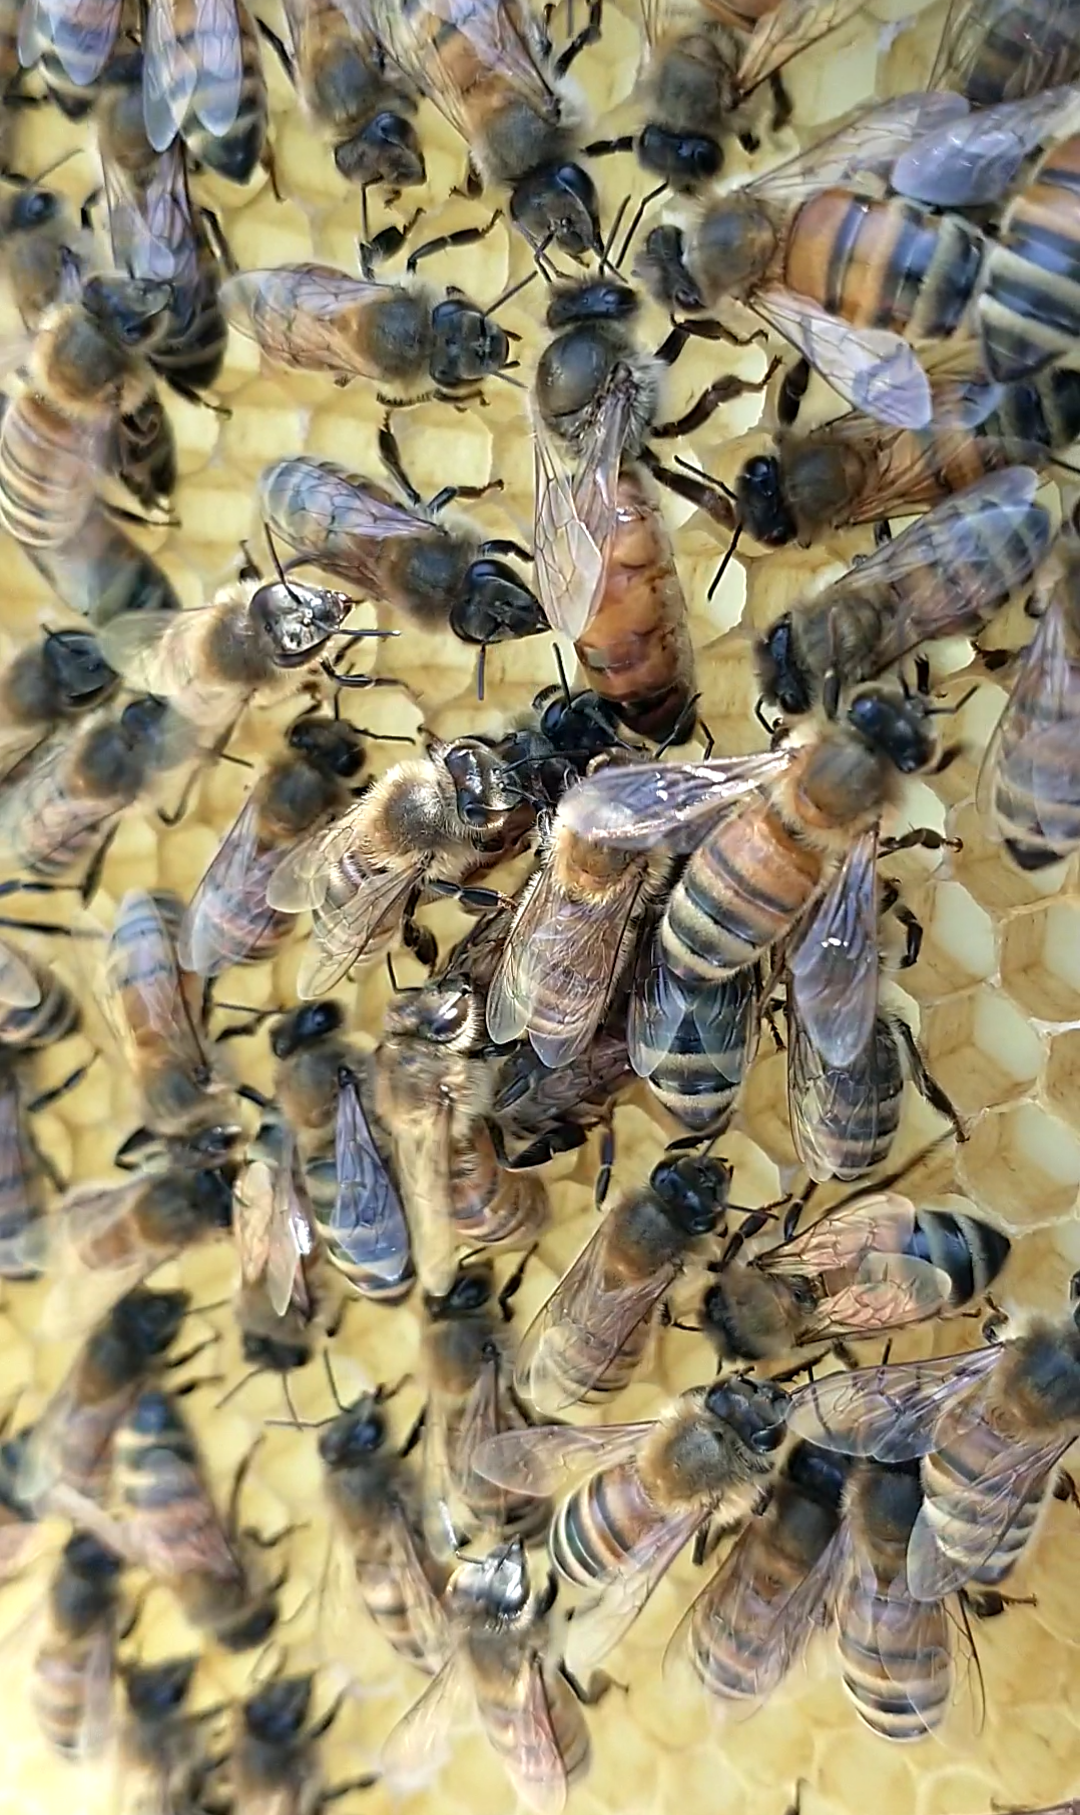
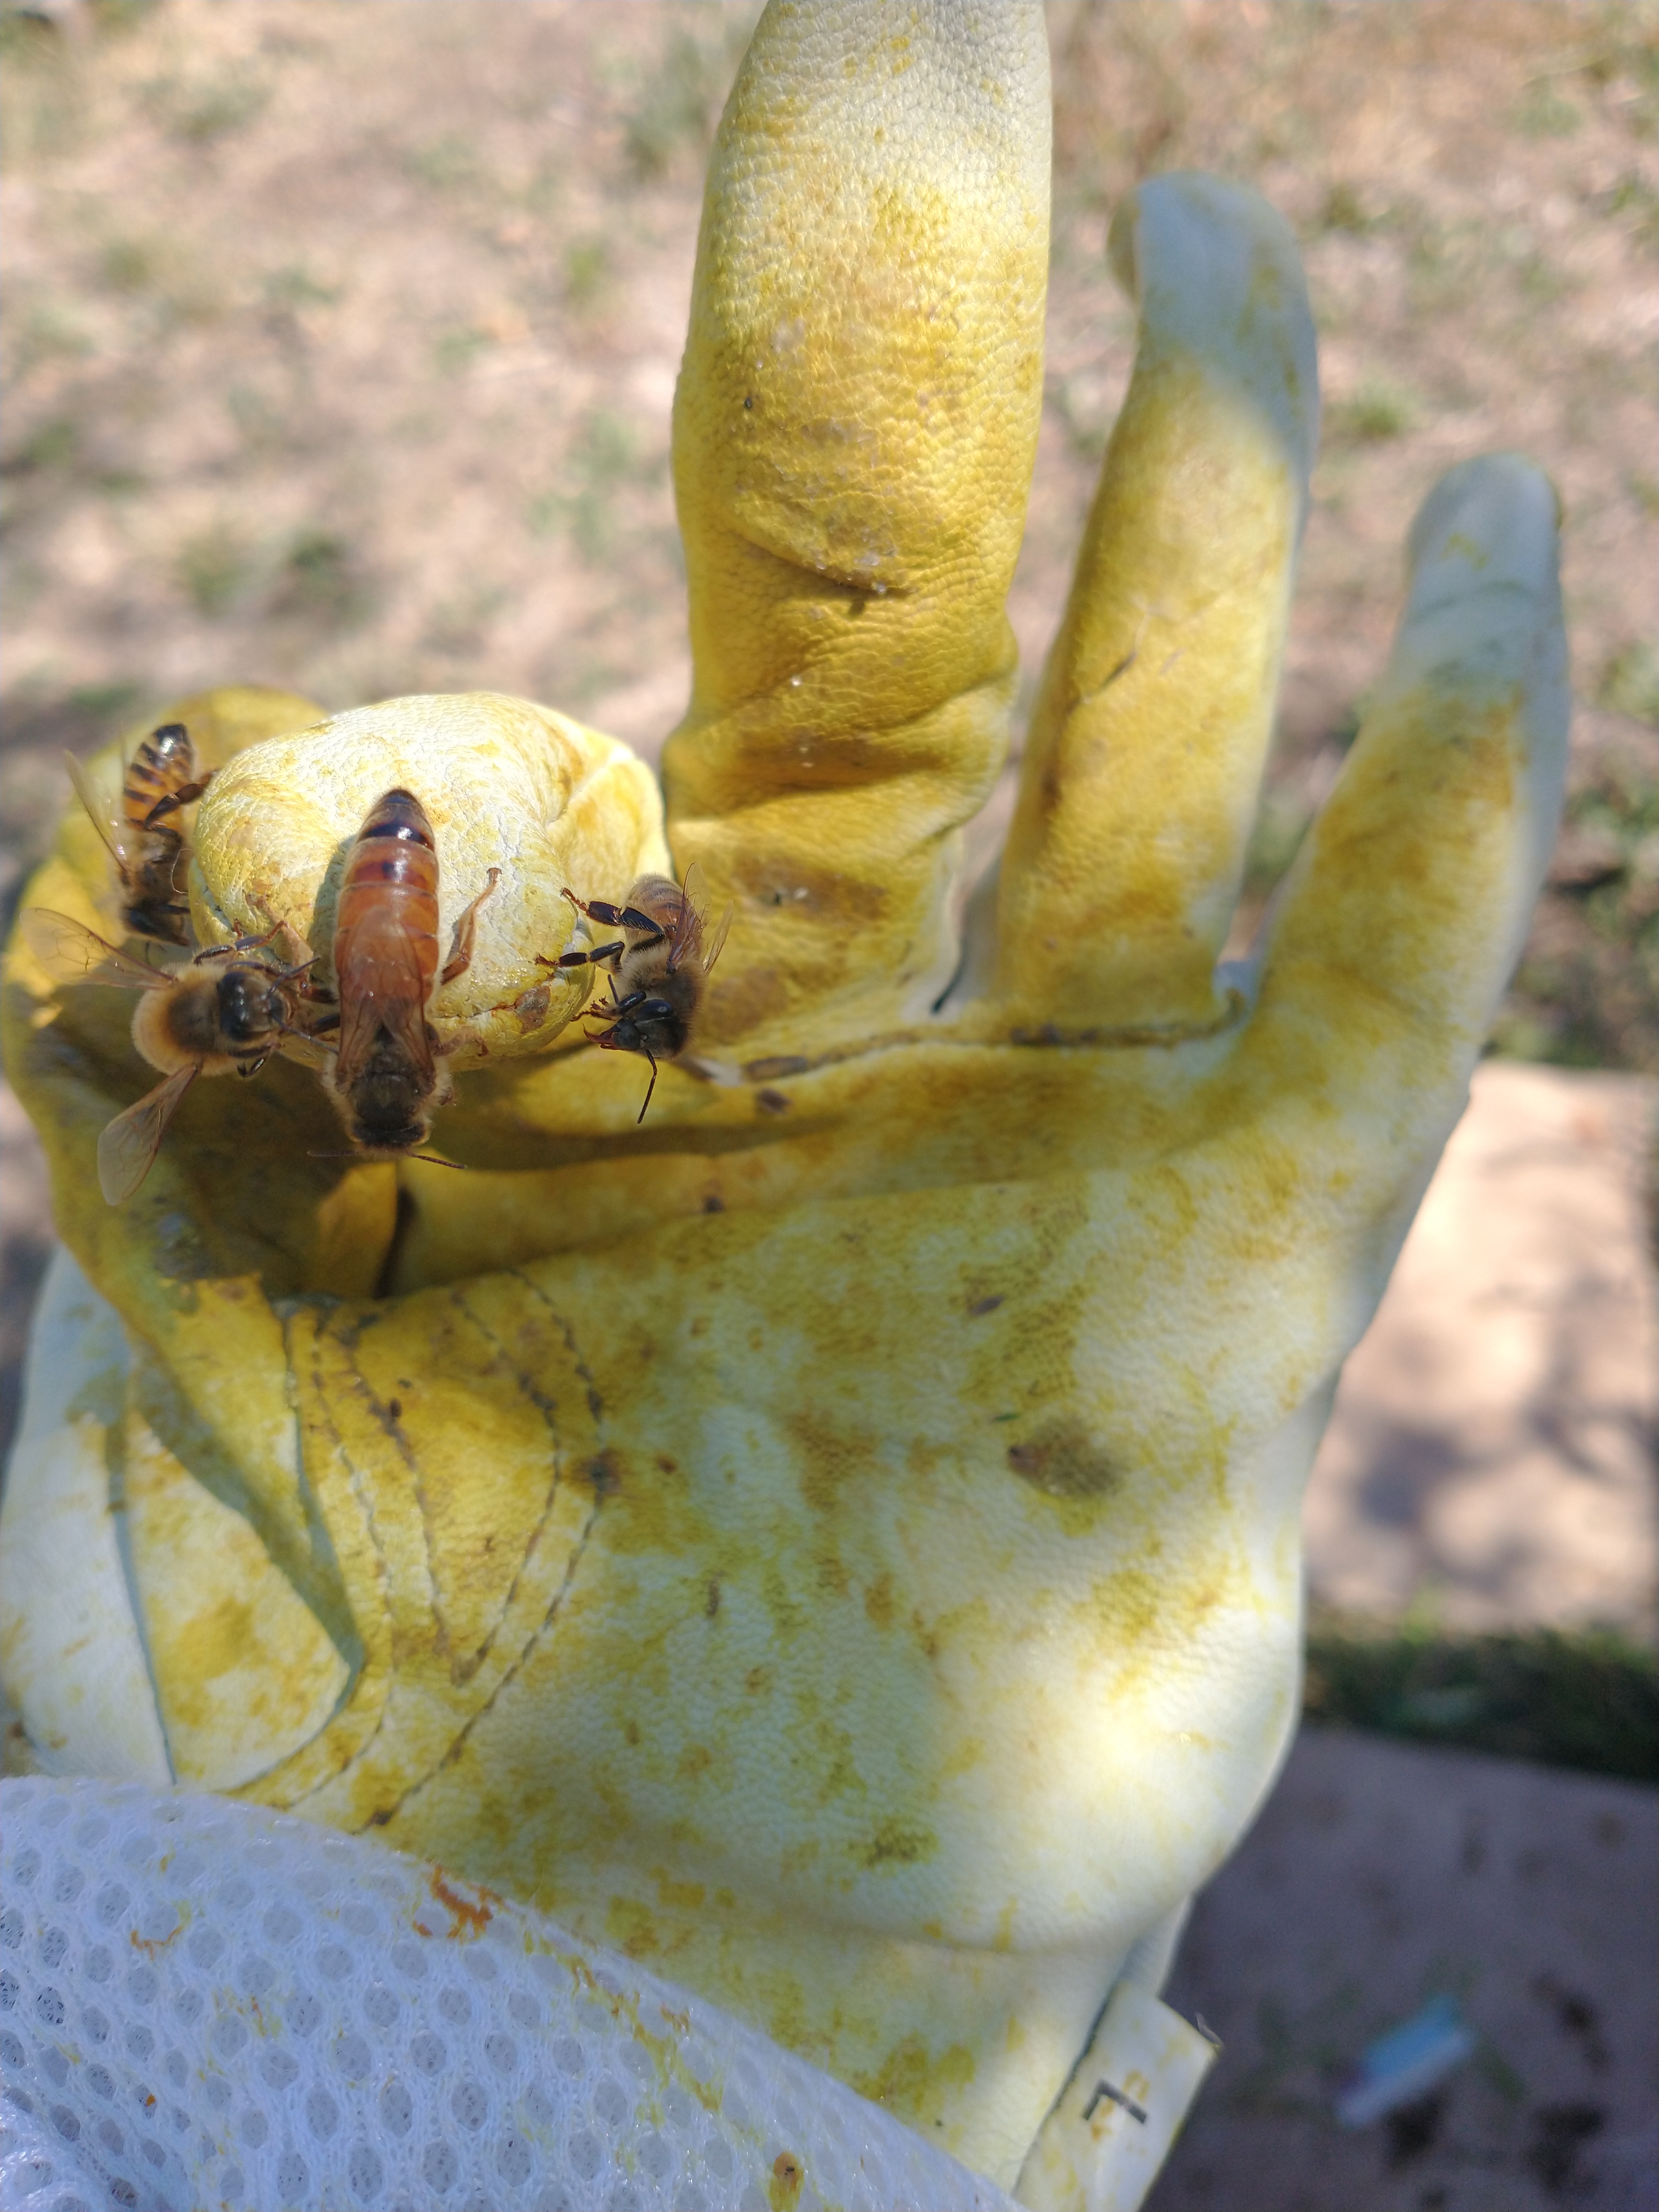 The last time I posted about beekeeping, I wrote about making a split and watching the bees rear a new queen for a new colony. That queen, Queen Hippolyta I laid a ton of eggs all summer. Her bees seemed to be slightly meaner than Queen Leslie Knope II’s bees, but the colony was strong. I could hardly ever find Queen Hippolyta (named for Wonder Woman’s mother, by the way) in the hive, so I decided to try to mark her. Thus began a chapter of Queen Hippolyta I’s reign that has been, frankly, kind of unbelievable.
  Hippolyta Returns
 Queen Marked

 One way to prevent your bees from swarming is performing a split, which is essentially an artificial swarm. When I last posted about beekeeping I was on the fence about if/when to split my hive, but decided to do it after a nudge from our friend Rachele (thanks!). I would have liked to keep


 Garden
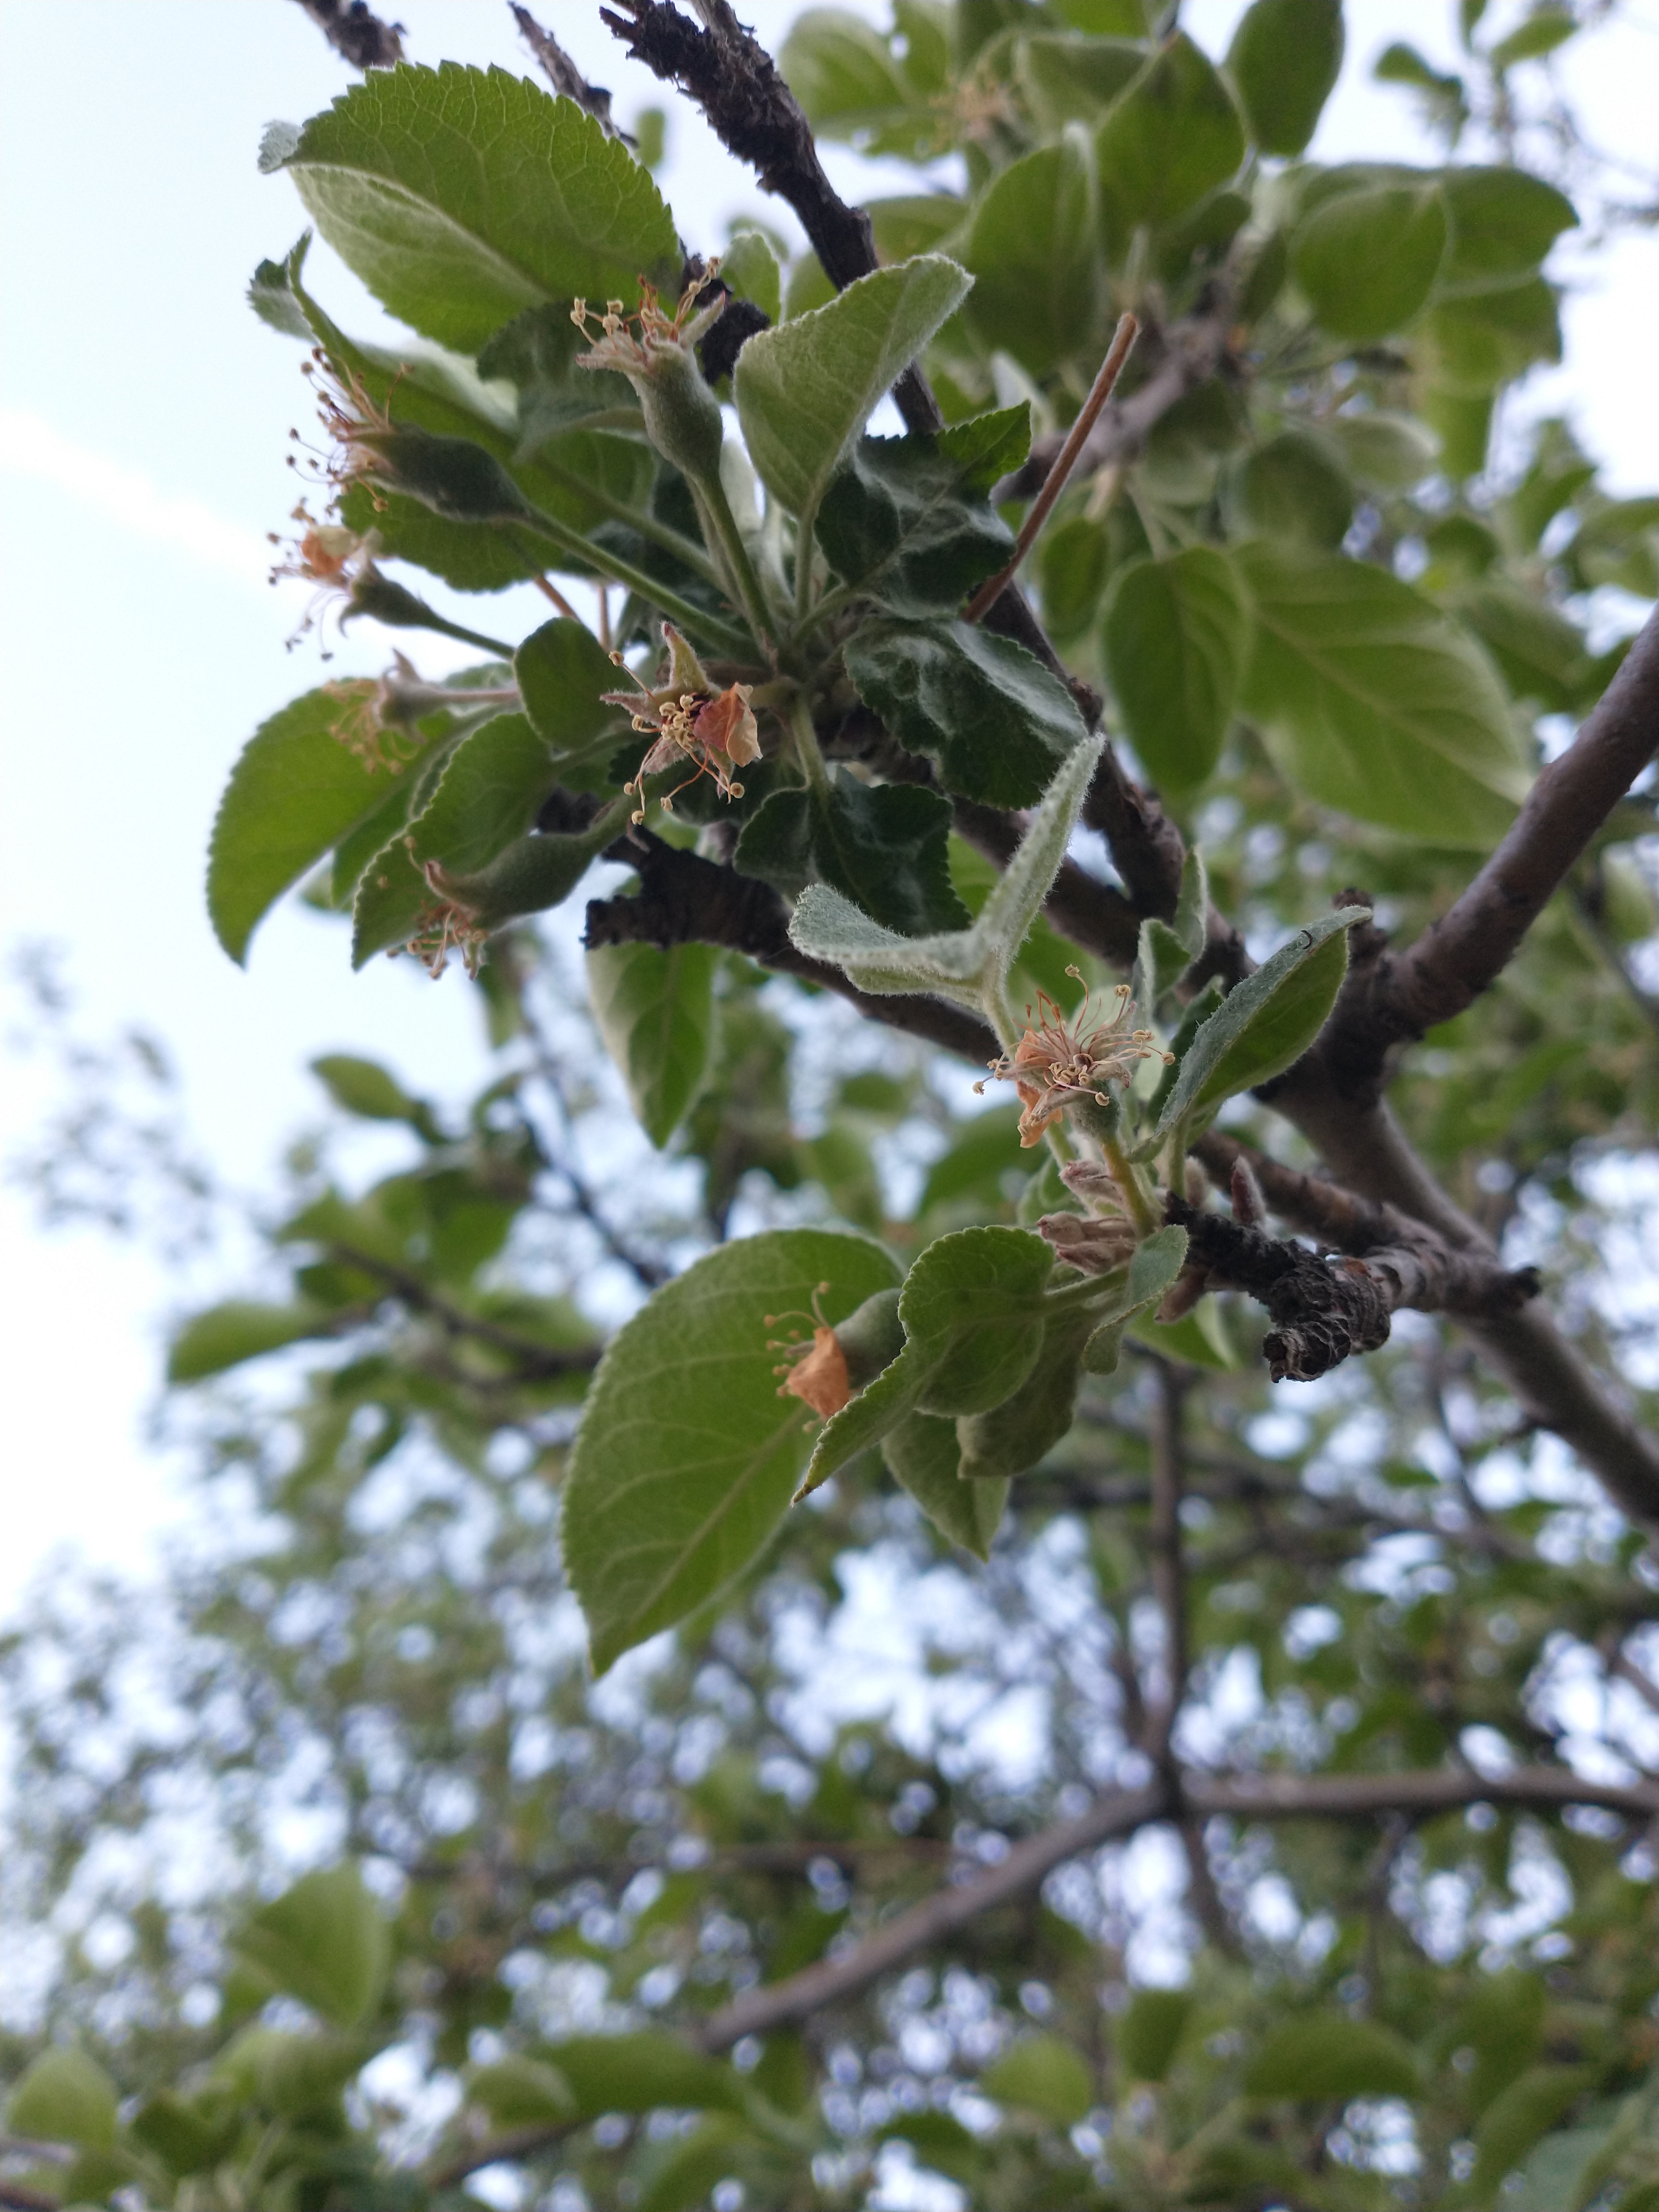 Orchard
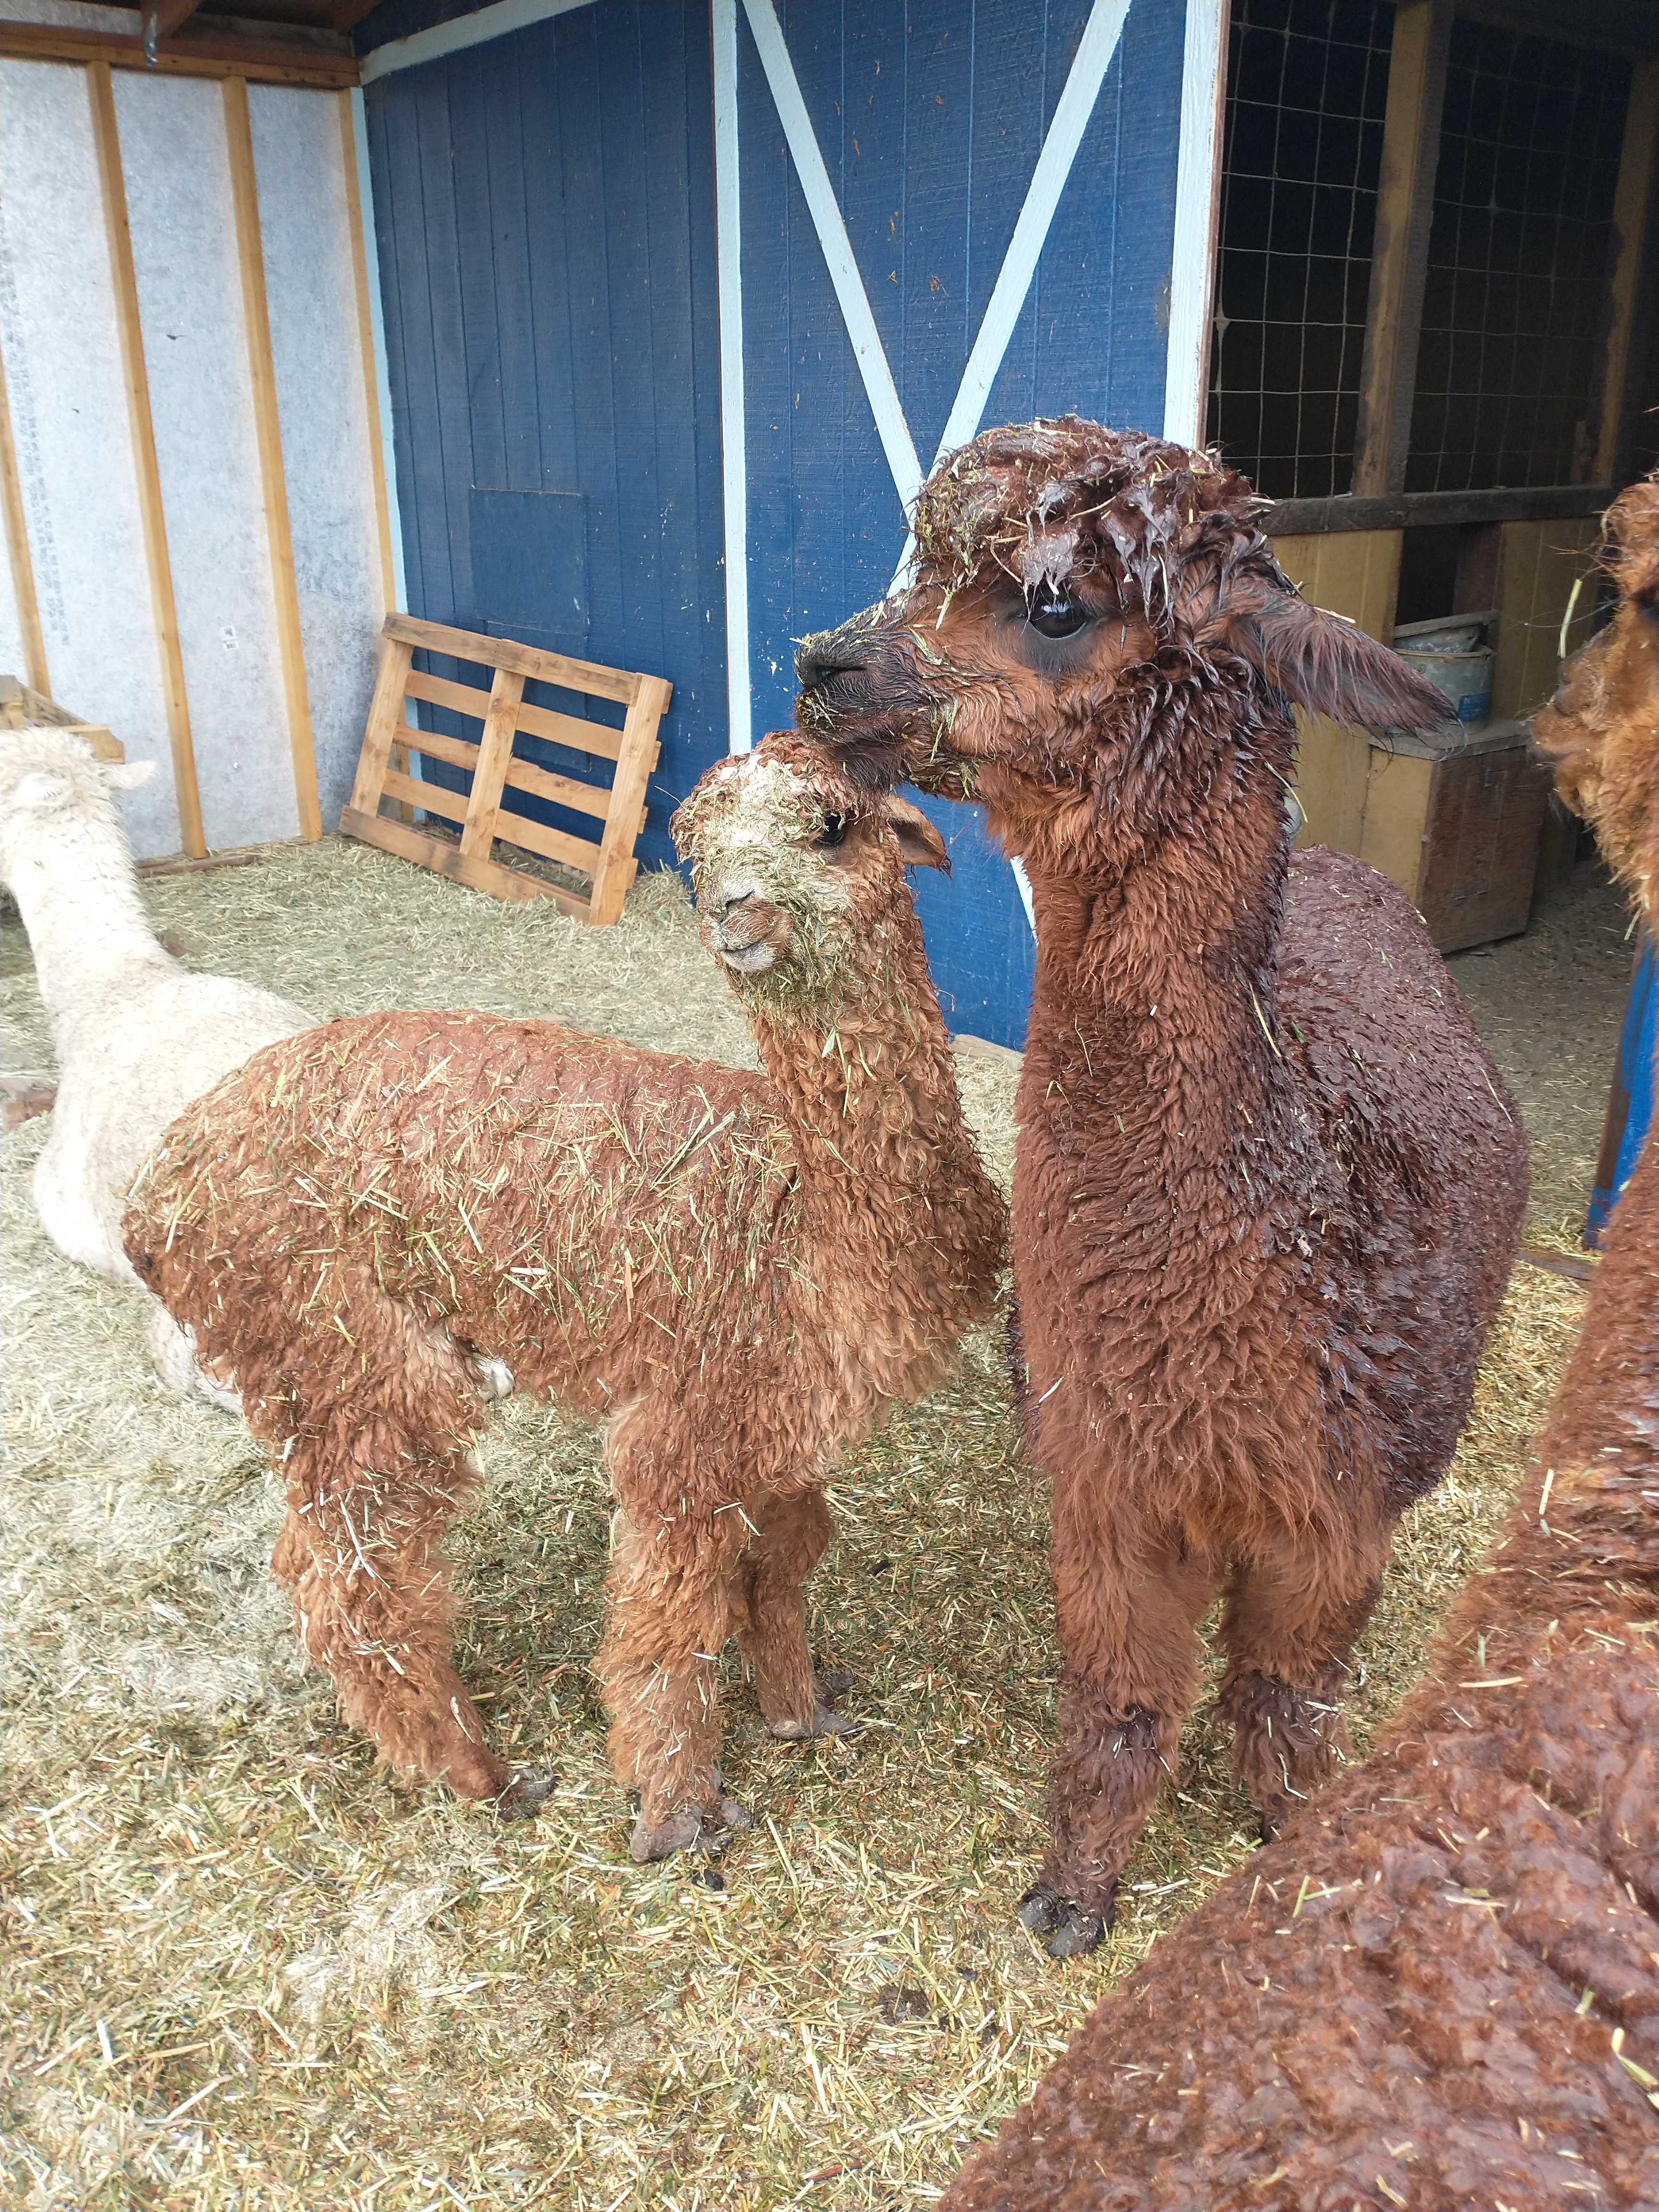 They’re wet, but probably enjoying a break from being hot. Alpacas can tolerate very cold temperatures, provided they have a windbreak.
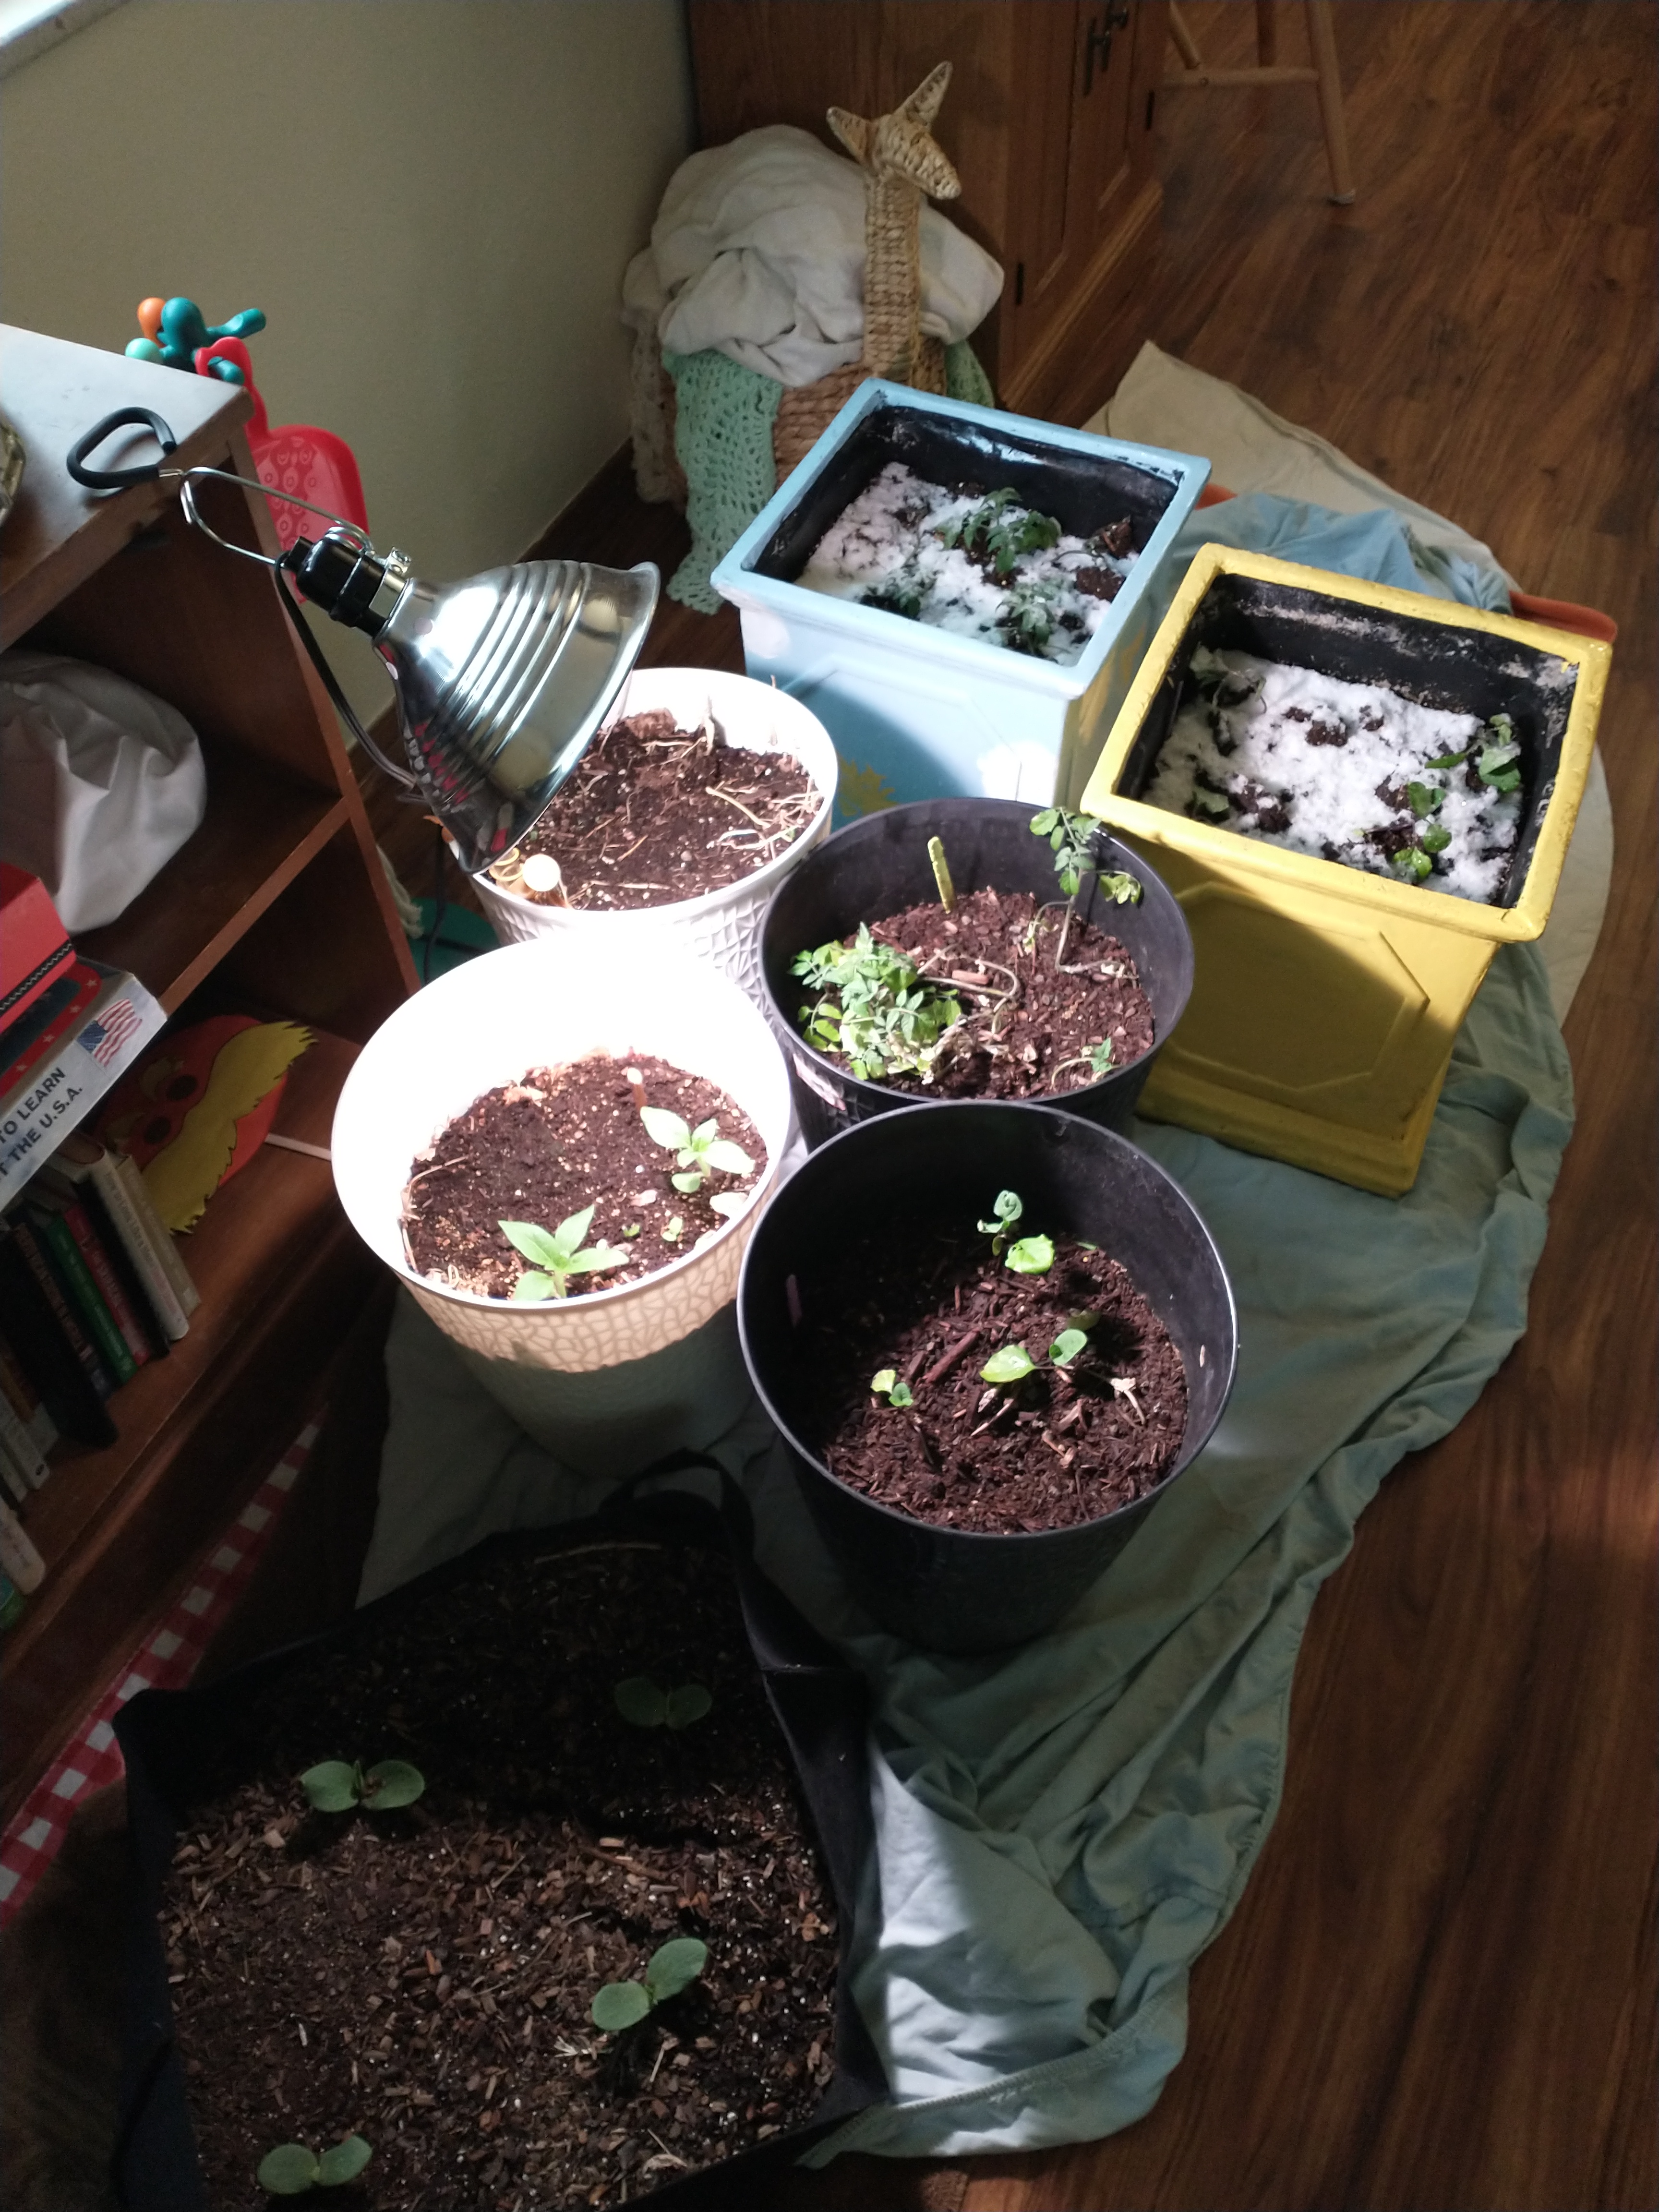
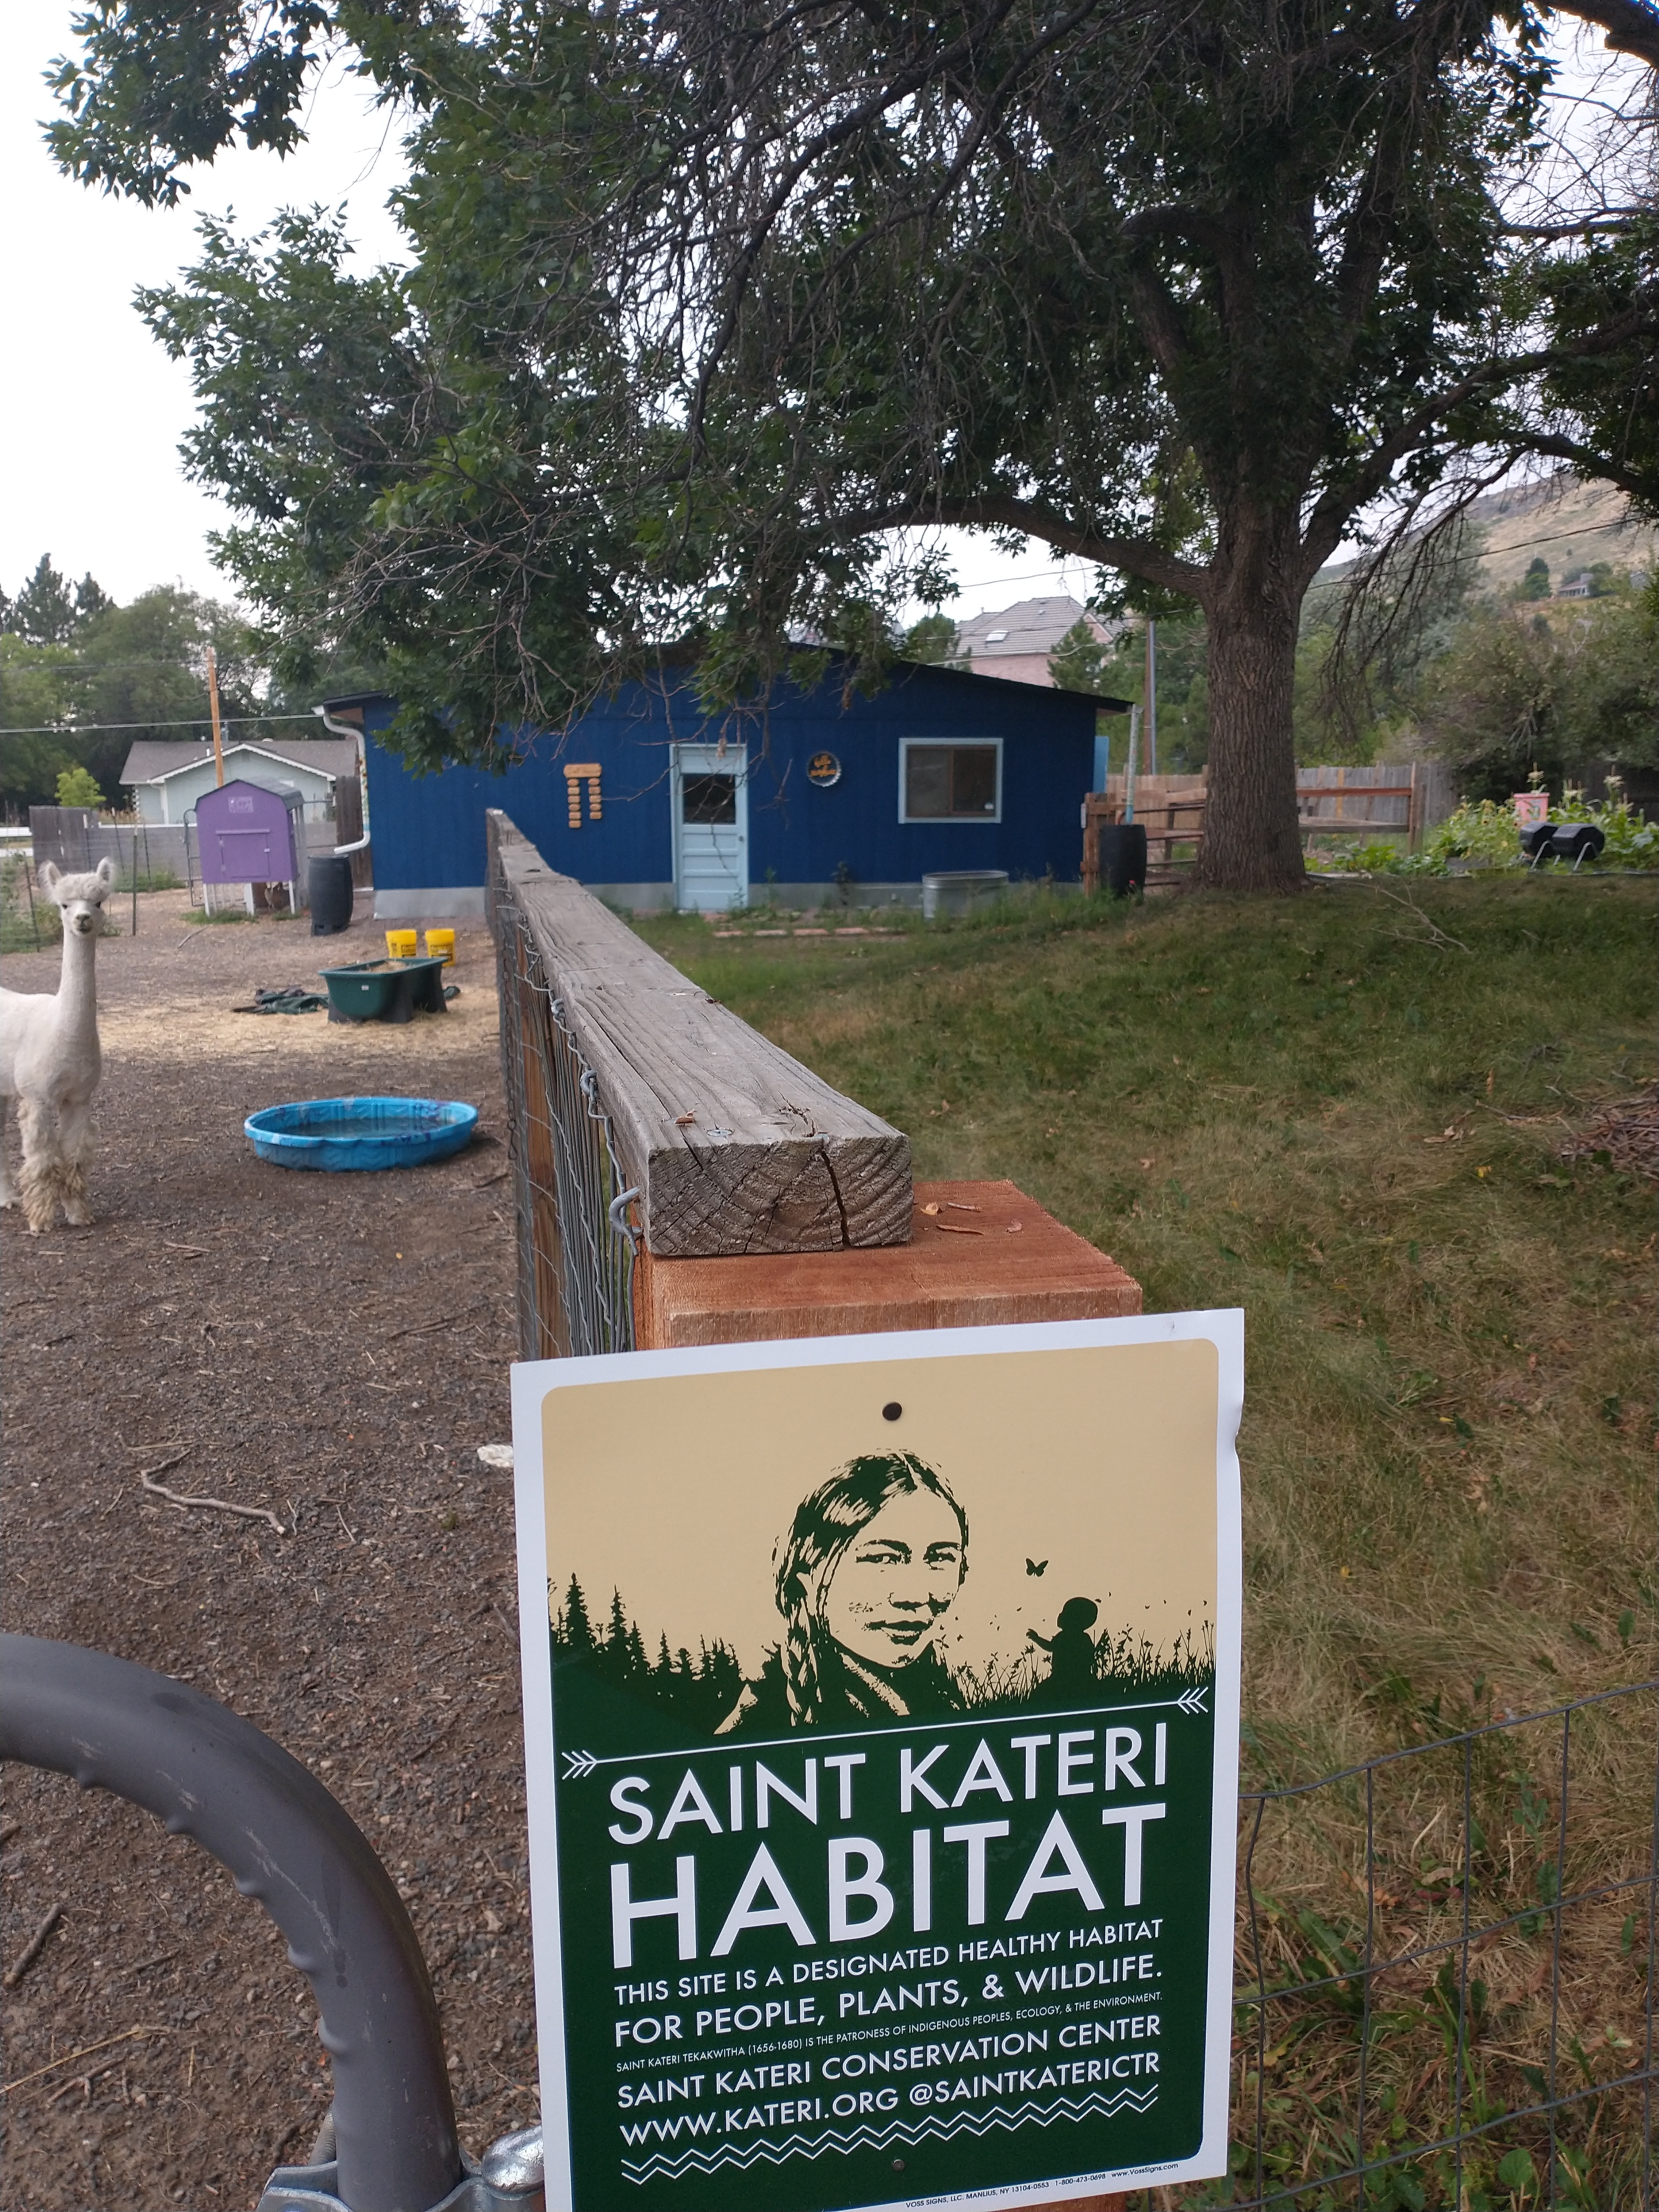 Become a St. Kateri Habitat
 If you are local to Denver, check out
  An easy low-waste switch is to use
  Back in 2018, I bought a couple of packs of cheap washcloths and have been using them, washing in hot water, and reusing them instead of paper towels since. Some of them are starting to get tattered, but I set them aside for
 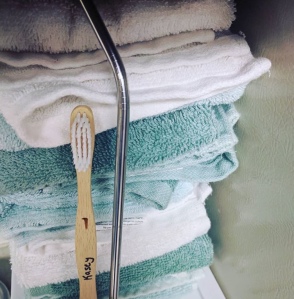 We have a subscription to
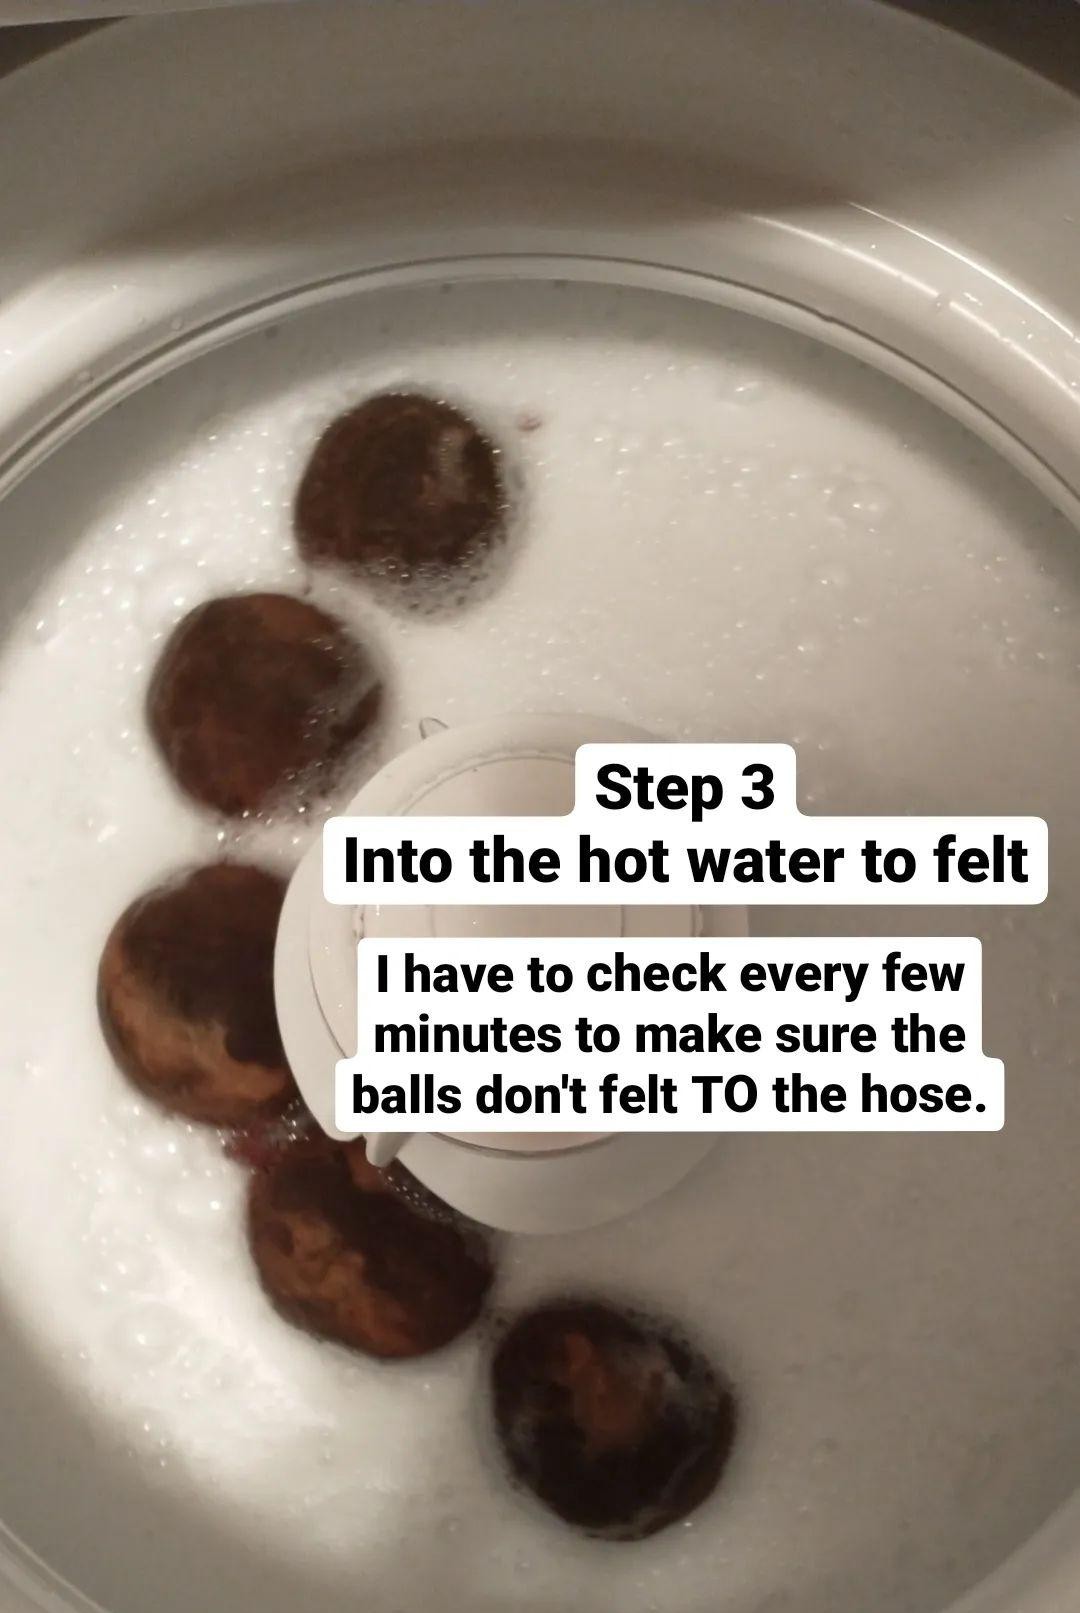
 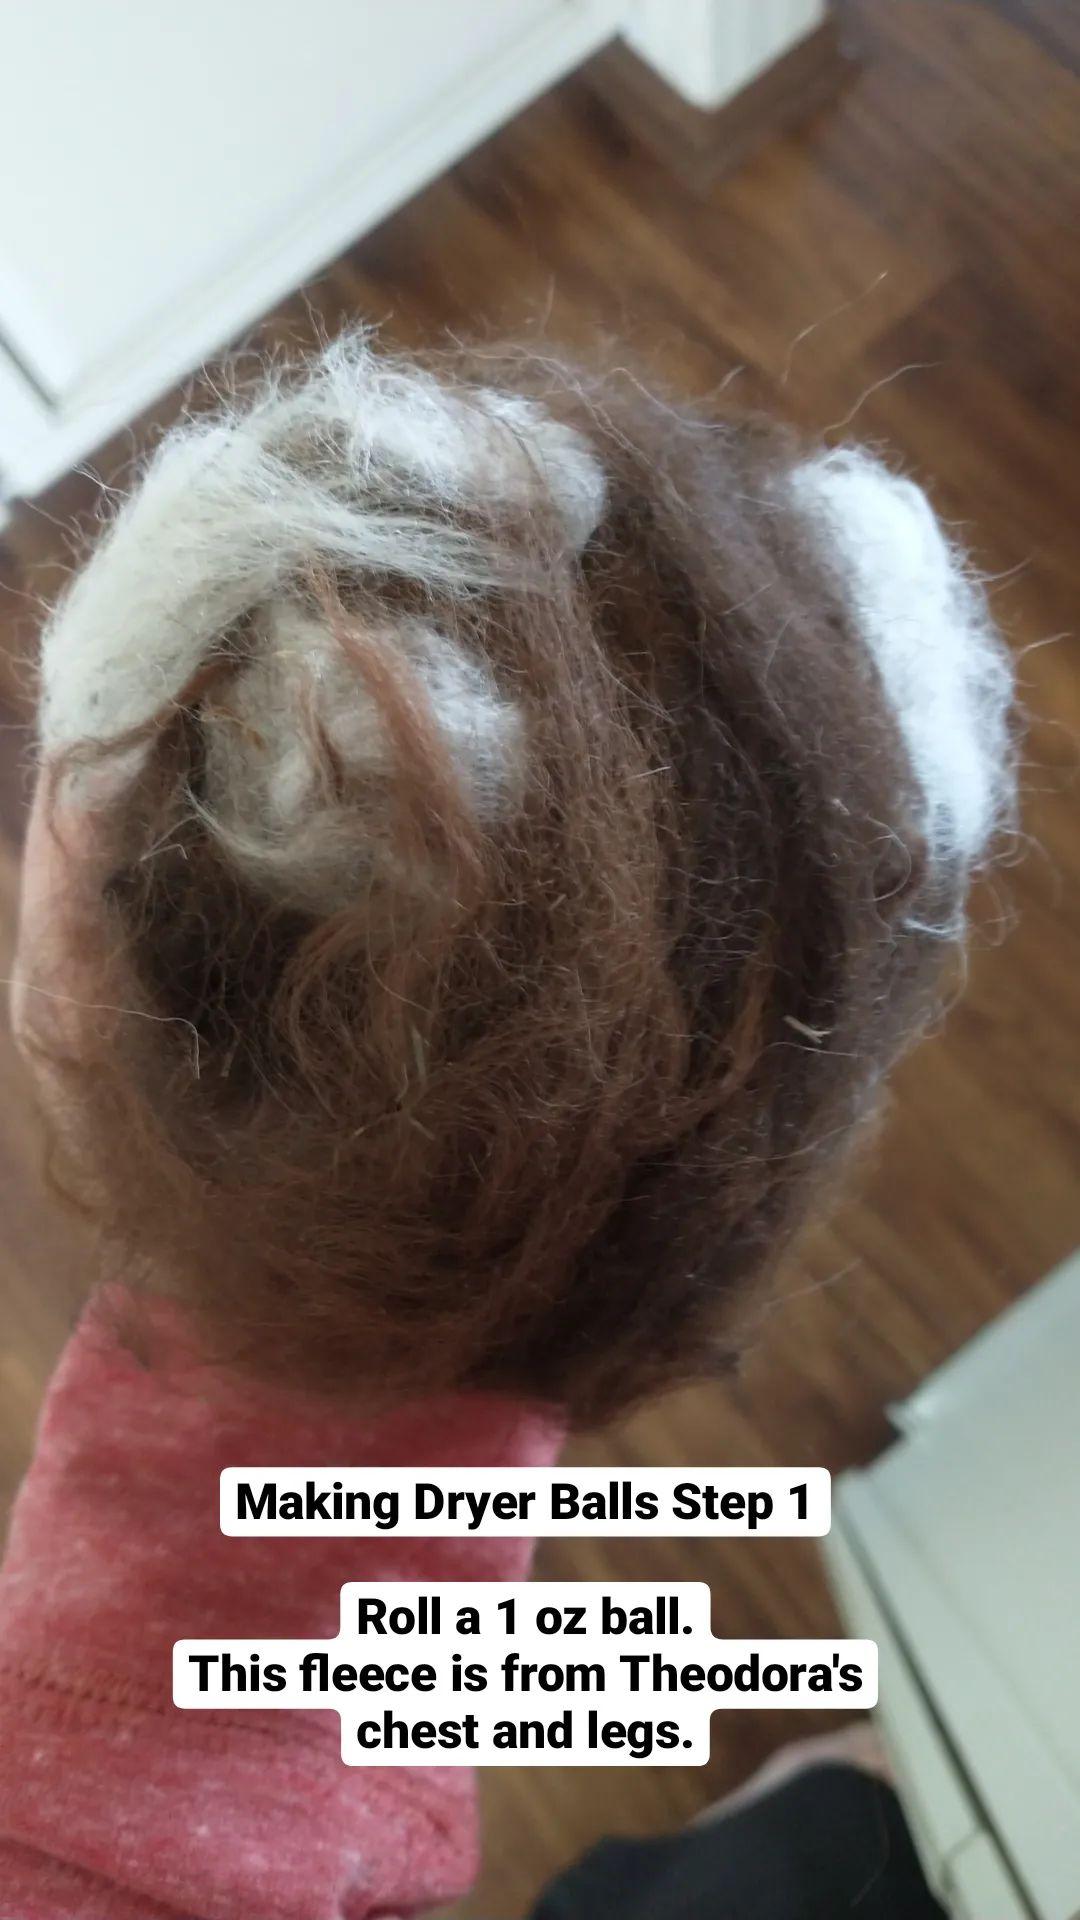 First, we wash the fleece. For this batch of dryer balls, I used Theodora’s seconds. I washed the fleece twice until the water ran clean, then plucked any remaining hay out with tweezers.
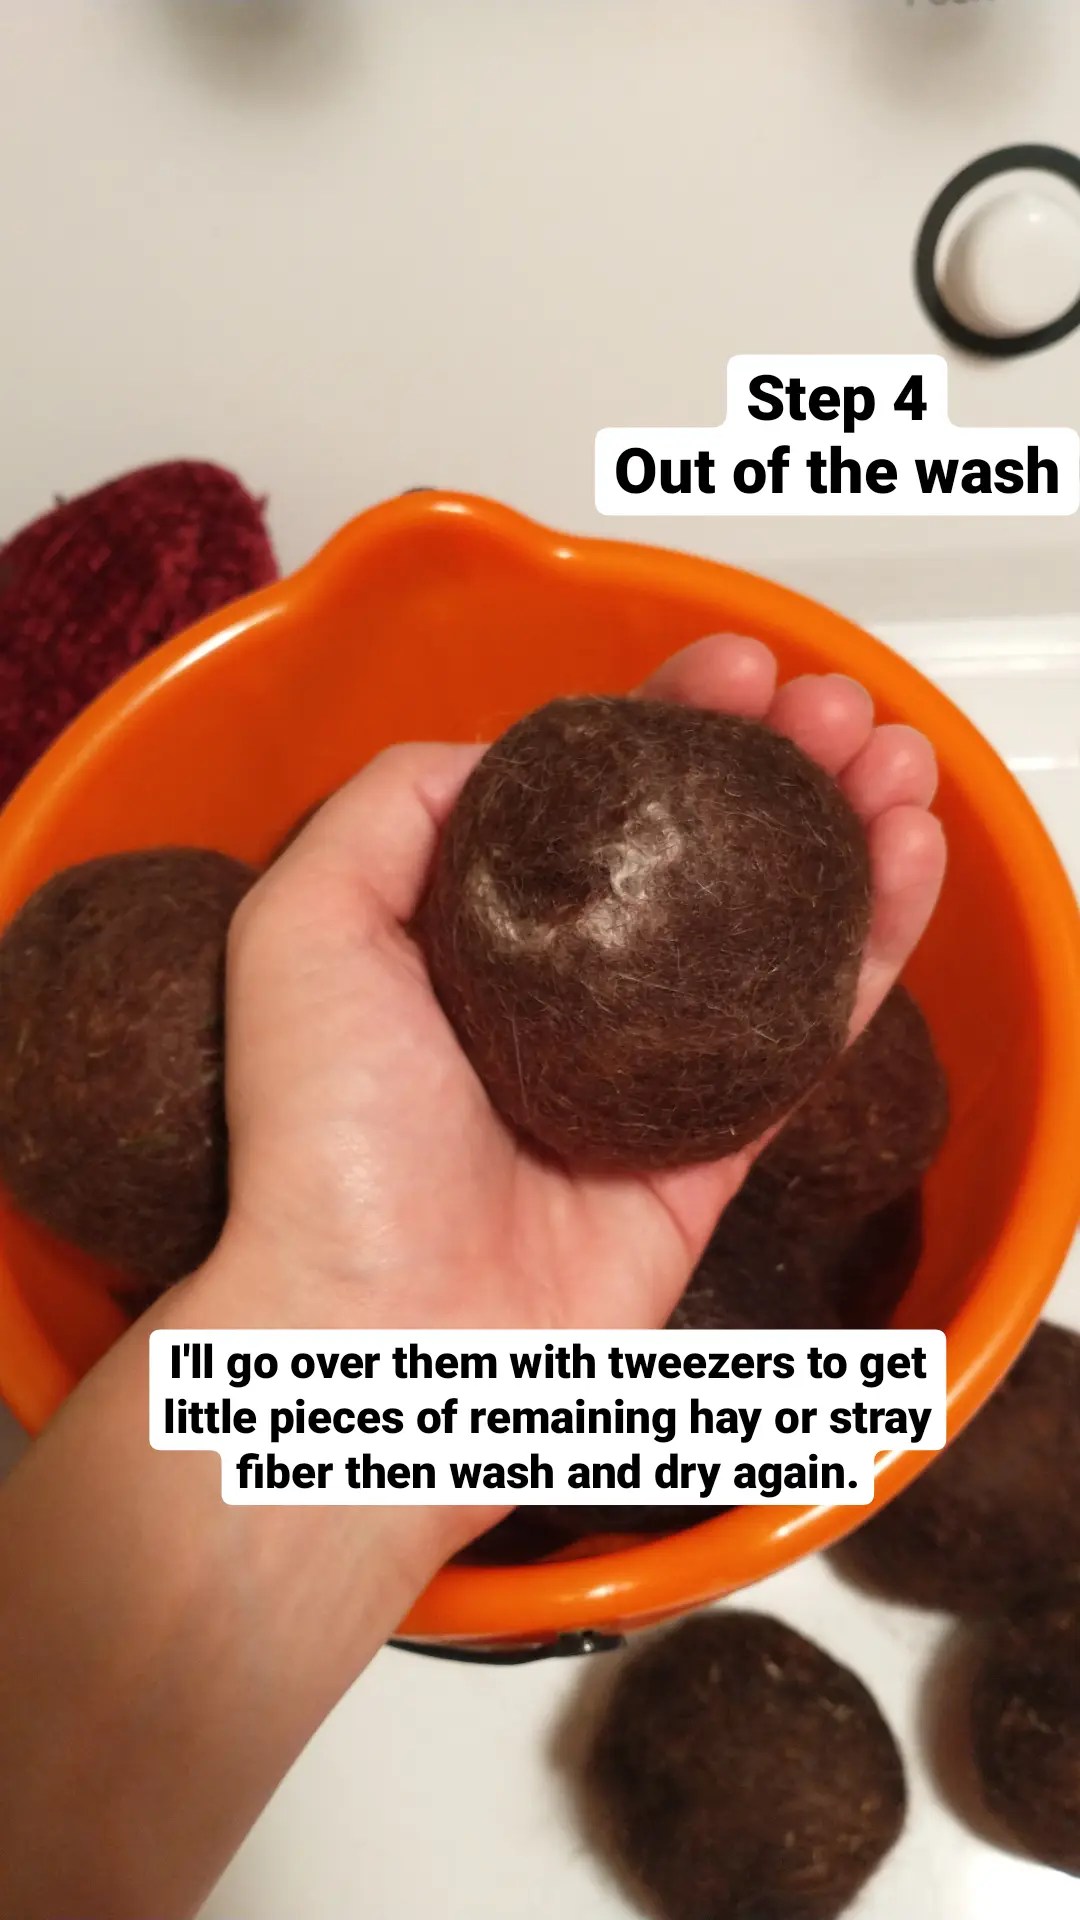 Alpaca Dryer Balls will be available at our market days for $15 for a set of three. Any balls that do not pass quality control will be available at a discounted $3/each. We think they’d make nice toys for your cats or dogs. Follow us on Instagram